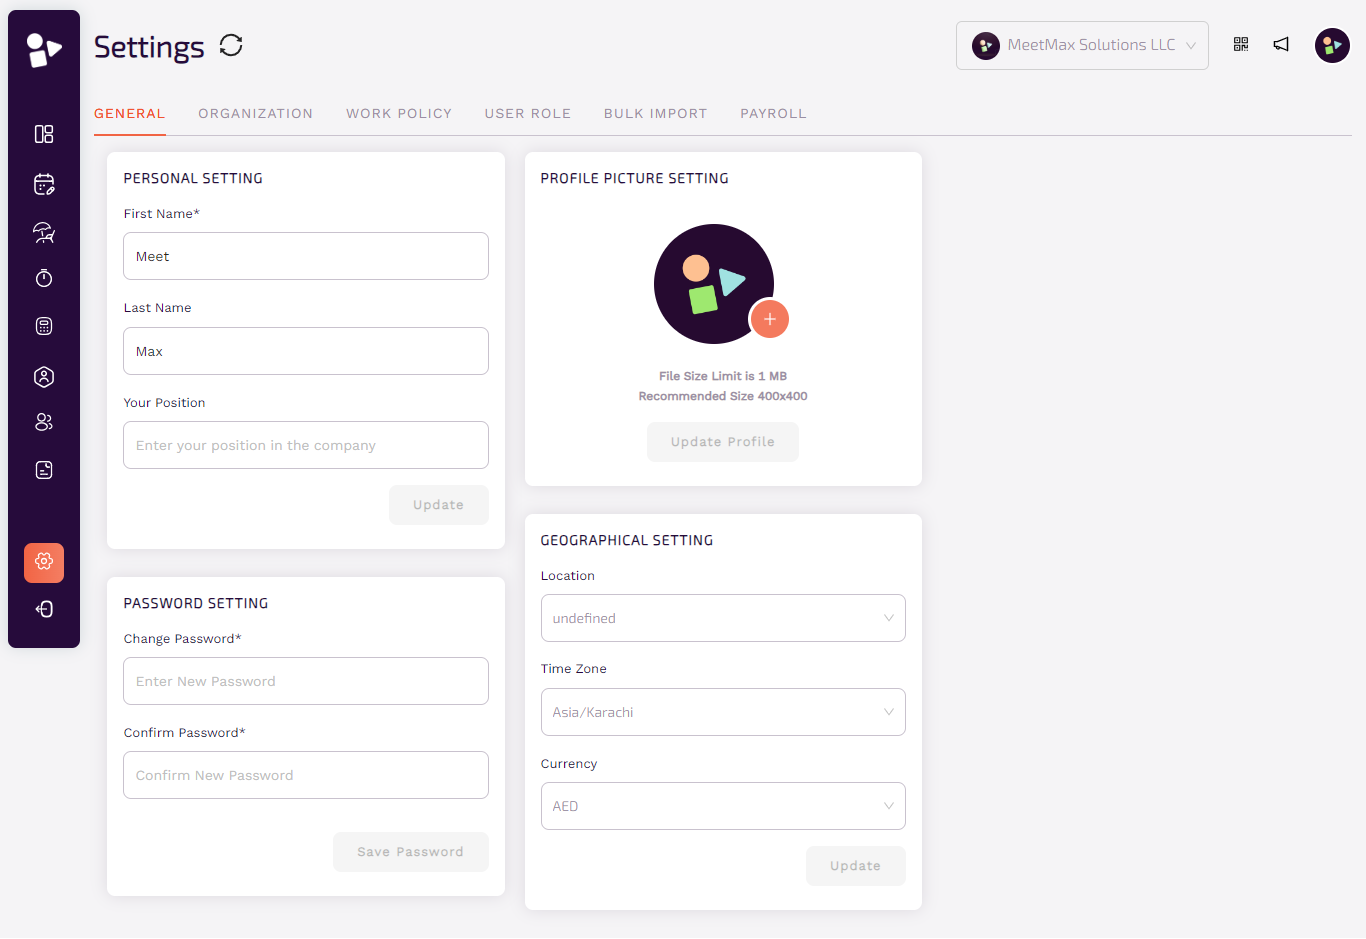
General Settings
These settings are basic but essential as they define small details about the profile that exists. It allows the admin to configure the information.
These general settings in Max HR is divided into the following as;
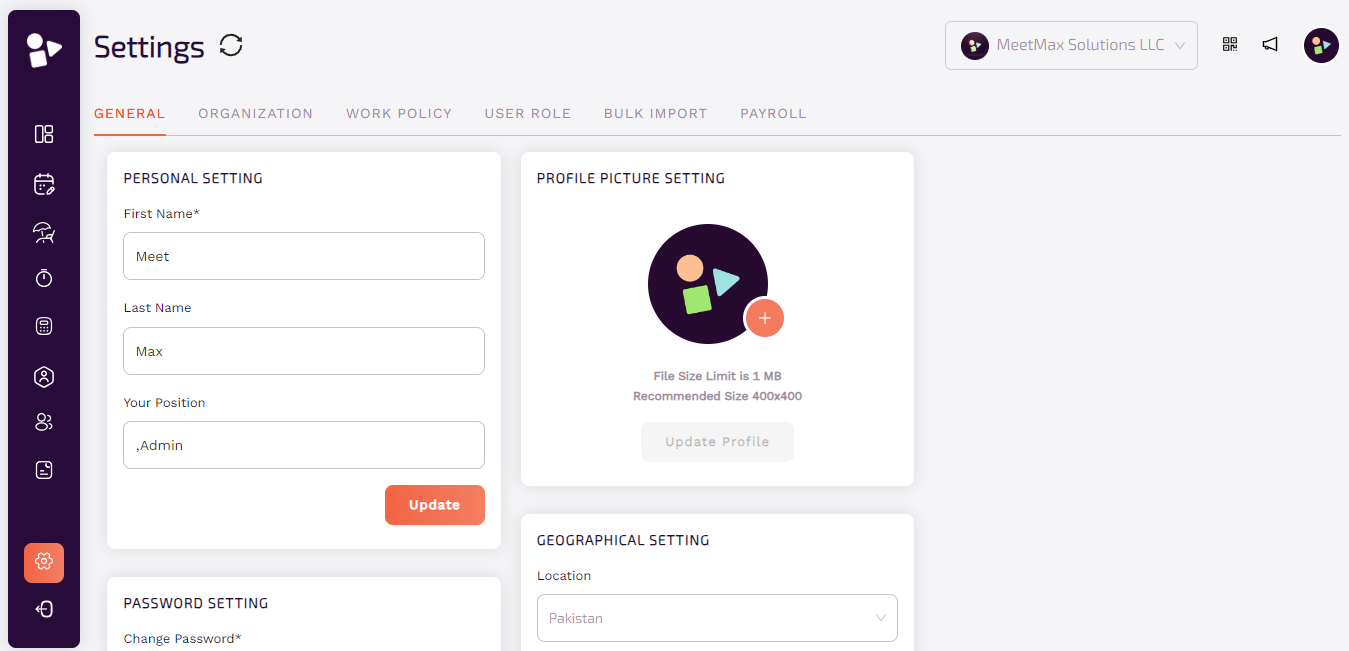
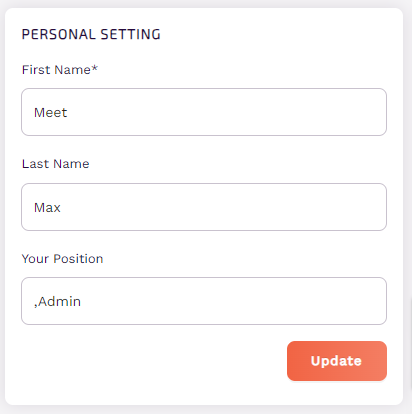
● Personal Settings
○ Add your first name, last name and position in the organization.
○ To make changes in any above field, simply enter and update information.
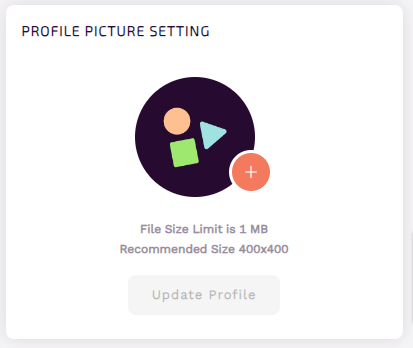
Profile Picture Settings
○ To upload or update the picture, click on plus icon to choose file.
○ Click on update to make changes
○ Click on update to make changes
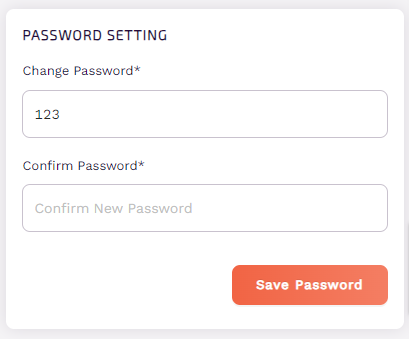
Password Settings
○ To update password, add new password and confirm new password in the text field.
○ To save changes, click on save password.
○ To save changes, click on save password.
Geographical Settings
○ To add or update geographical settings, choose location, time zone and currency using dropdown.

Organization ● Basic Settings
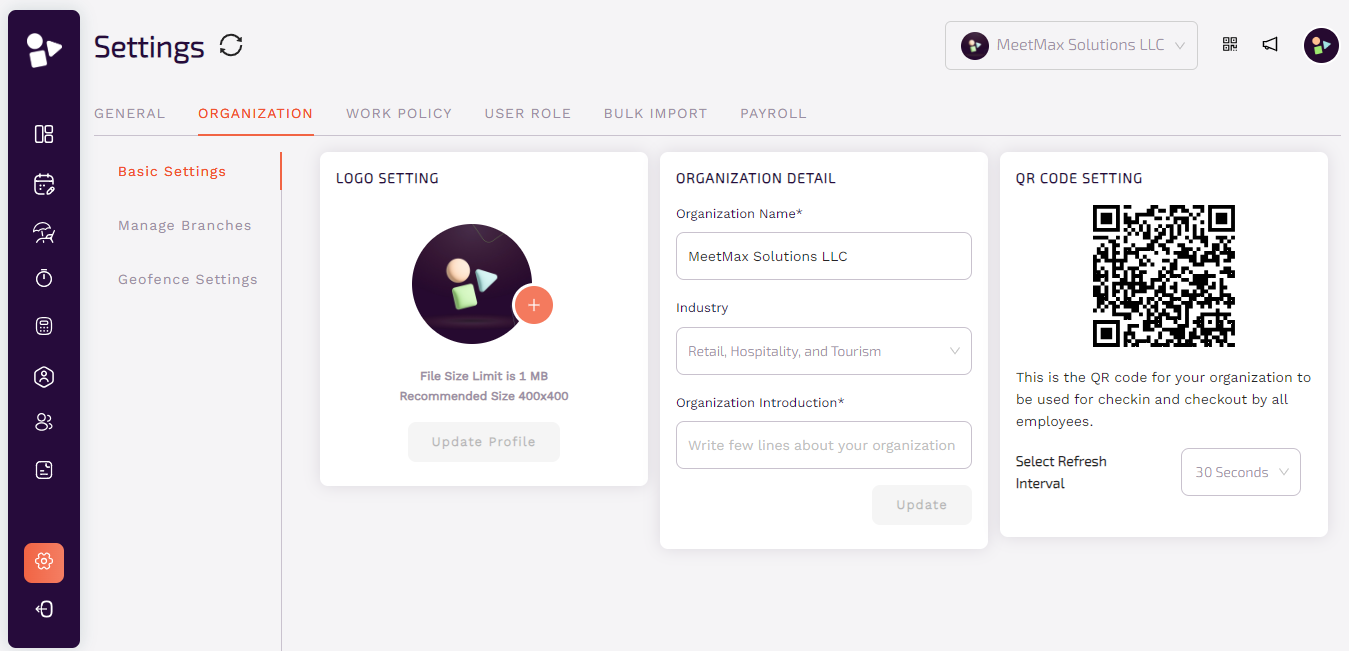
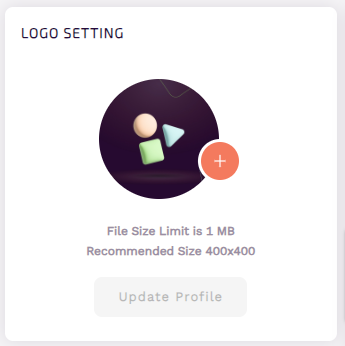
○ Logo
■ Add a new image by clicking on the “” icon.
■ Update profile after adding new image.
■ Add a new image by clicking on the “” icon.
■ Update profile after adding new image.
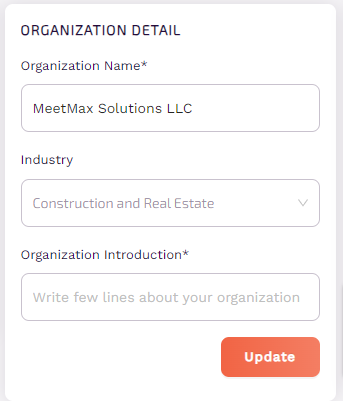
○ Organization detail
■ Add name and introduction of the organization.
■ Choose industry using dropdown.
■ Add name and introduction of the organization.
■ Choose industry using dropdown.
○ QR code
■ QR code is to do checkin and checkout by all employees.
■ Select refresh interval from the dropdown.
■ QR code is to do checkin and checkout by all employees.
■ Select refresh interval from the dropdown.

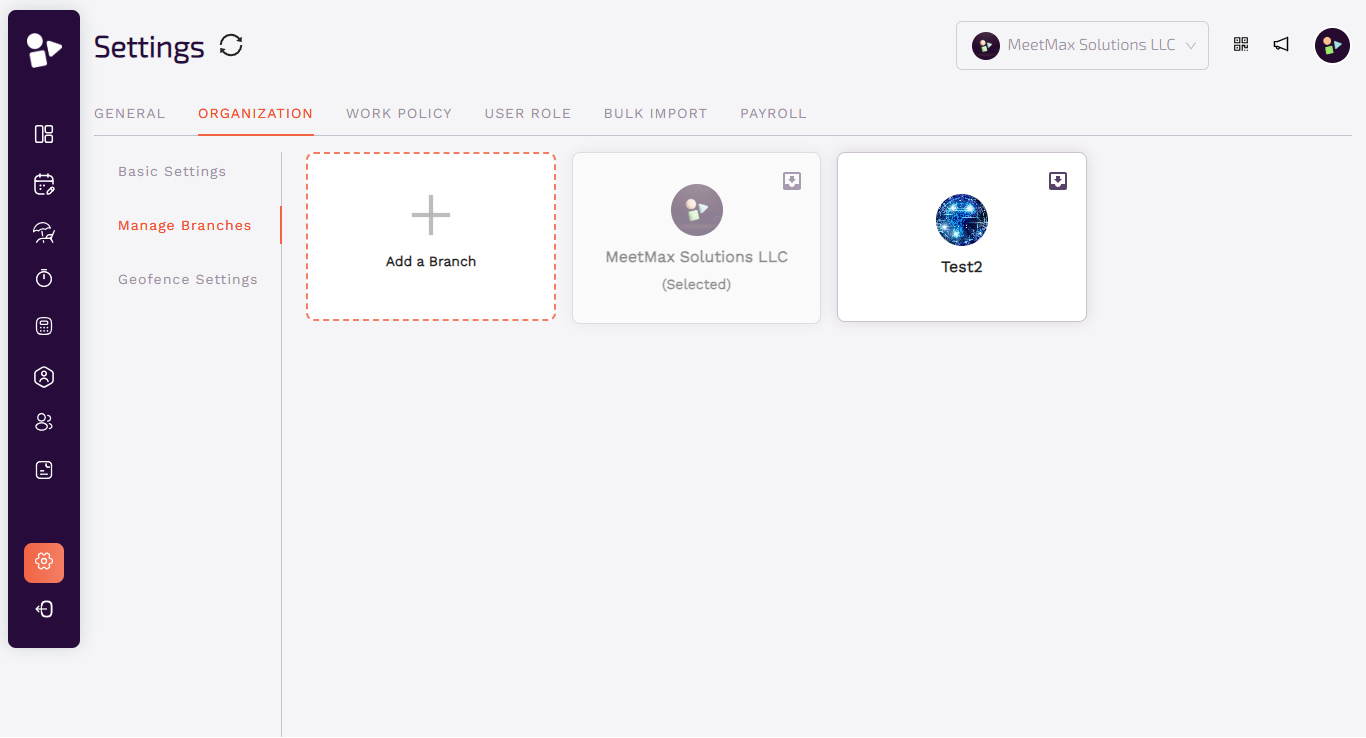
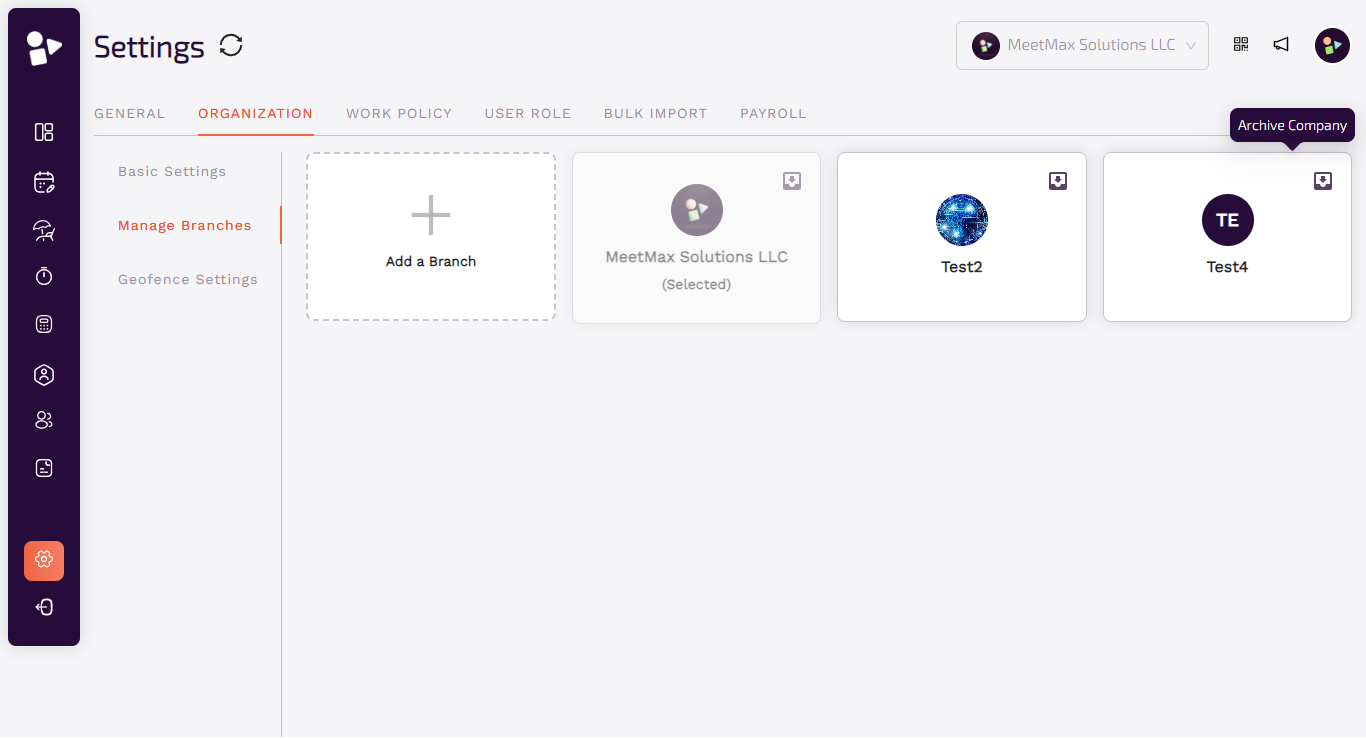
Manage Branches
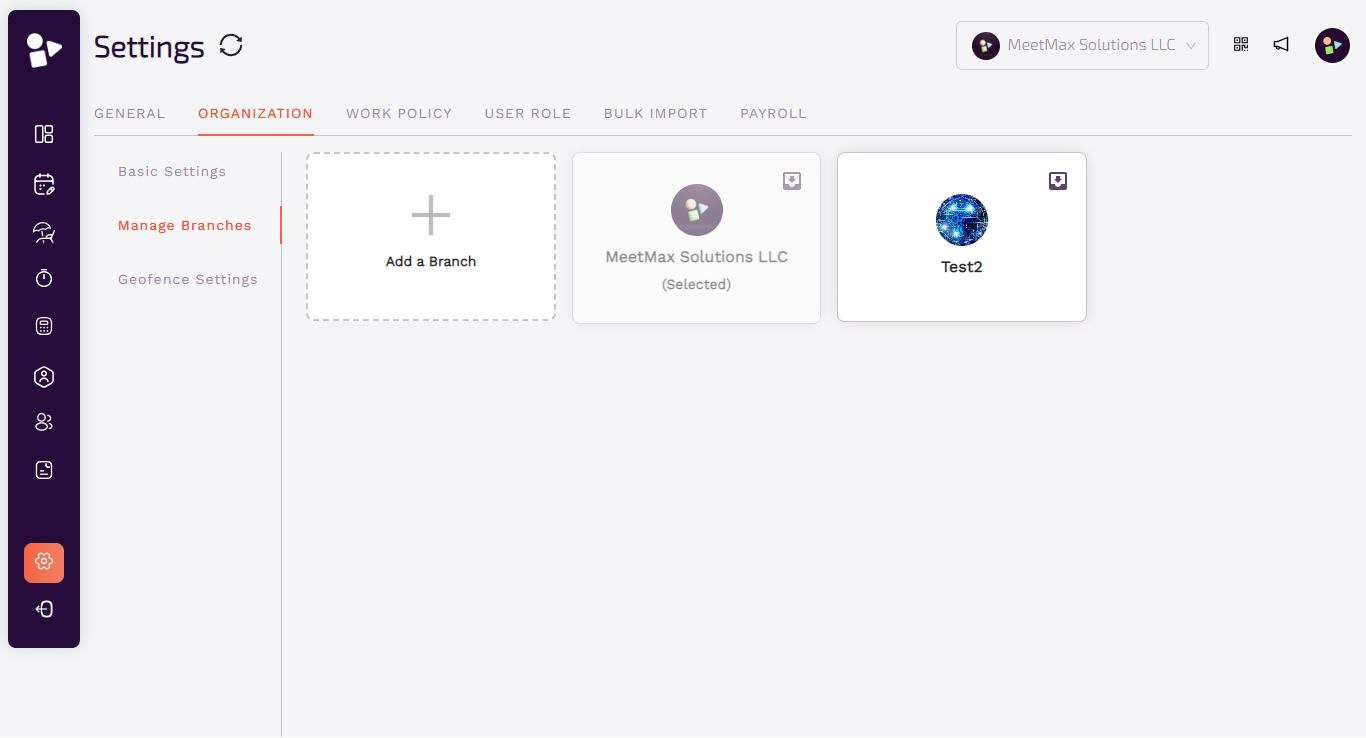
Add Branch
■ Click on the icon to add a new branch.
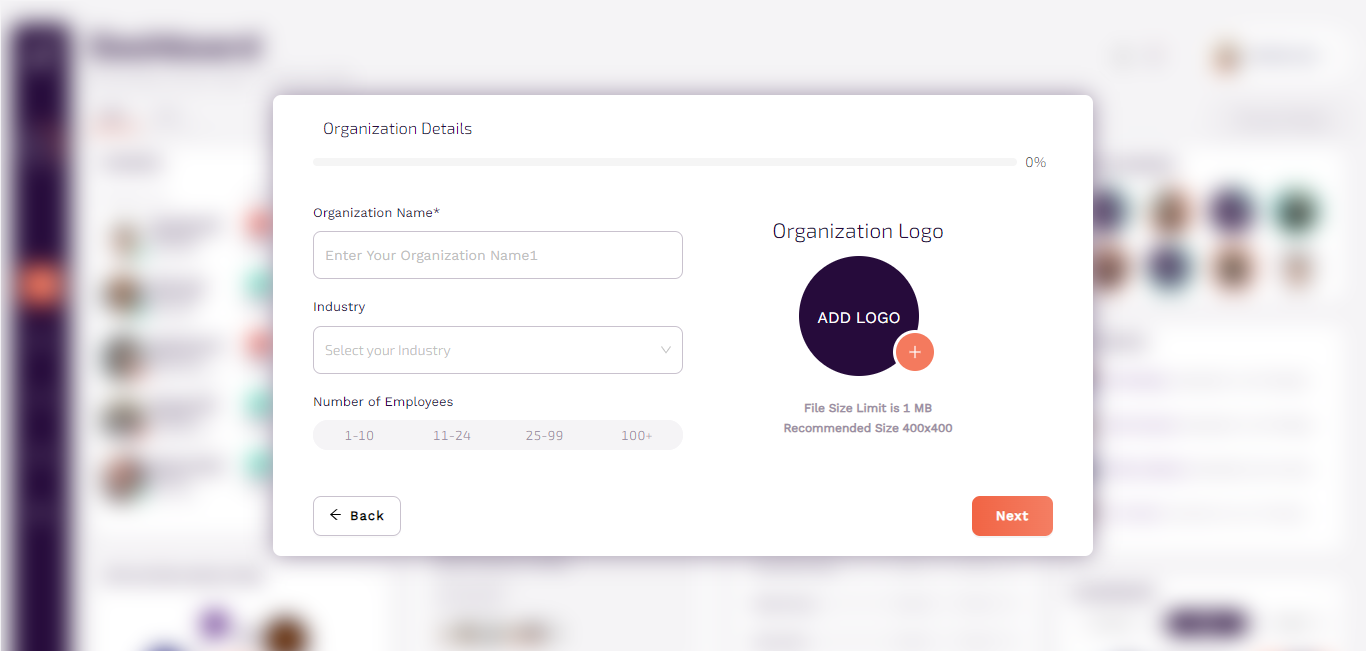
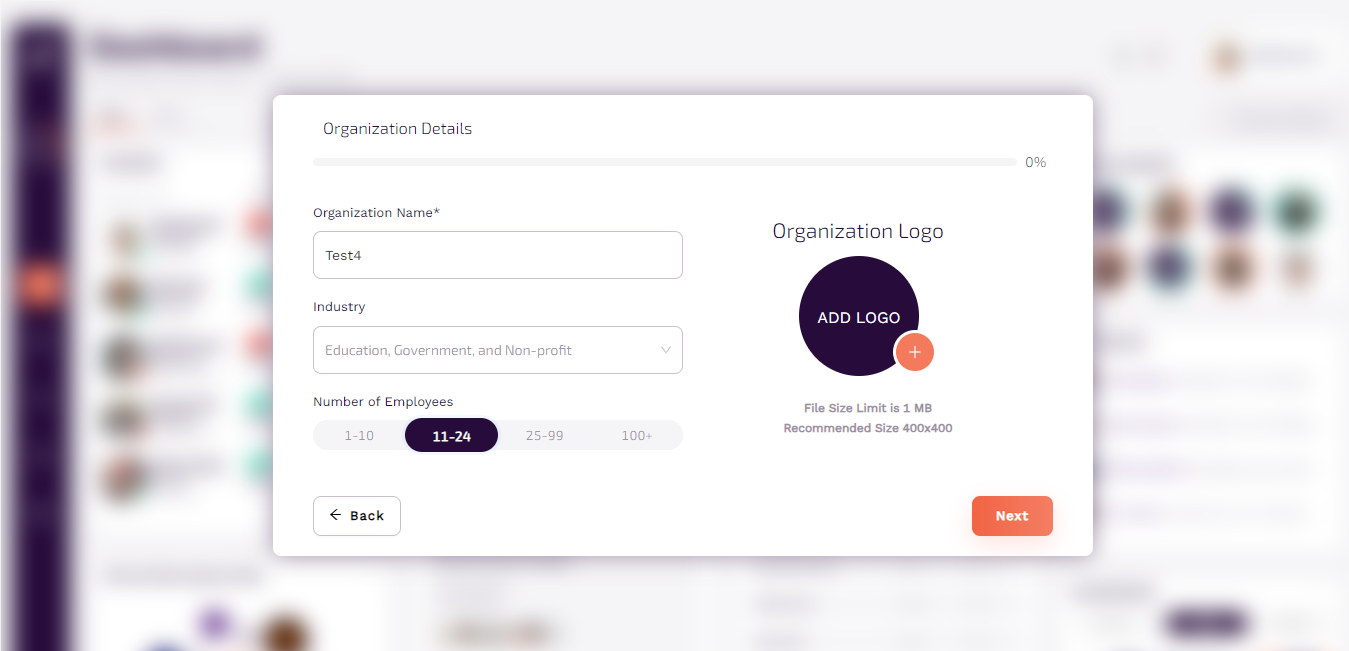
■ Following the popup that appears, add the name, logo, number of employees and industry of the organization.
■ Click on next to complete.
■ Added new branches can be archived too.
■ Following the popup that appears, add the name, logo, number of employees and industry of the organization.
■ Click on next to complete.
■ Added new branches can be archived too.
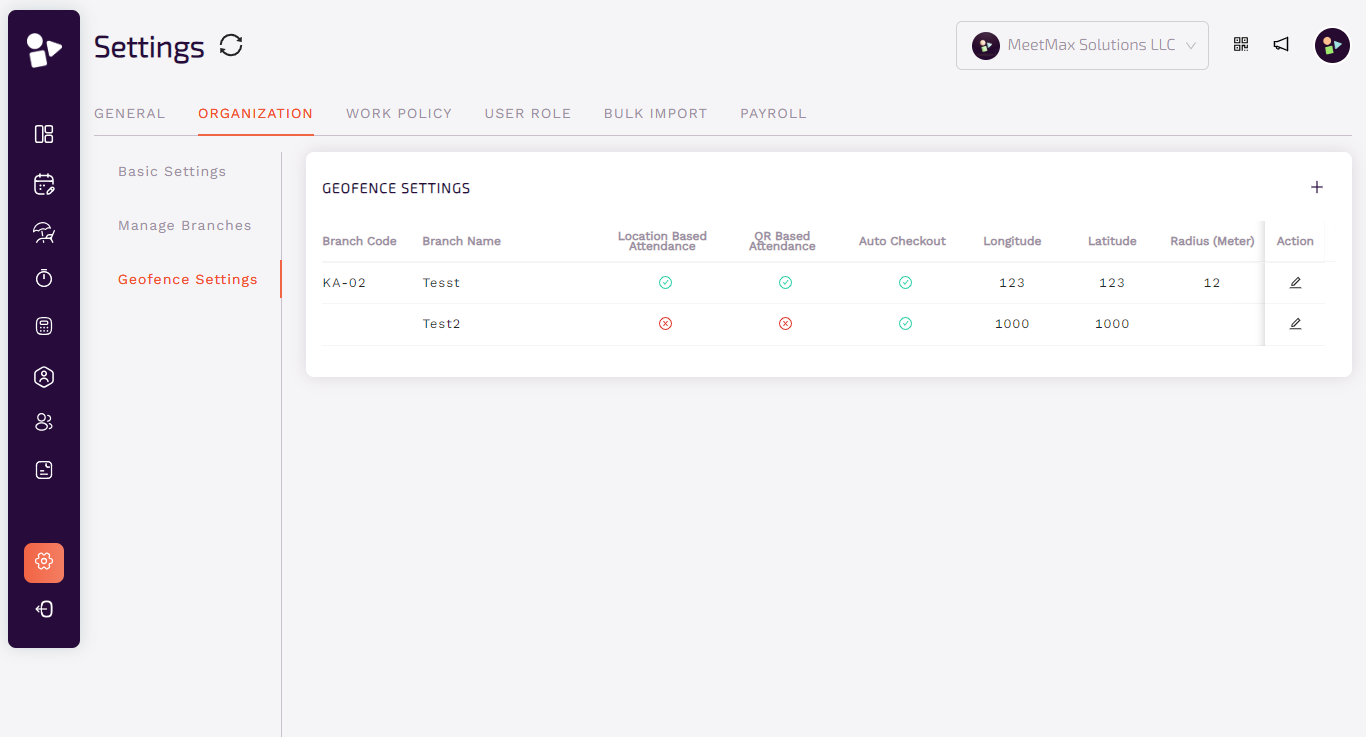
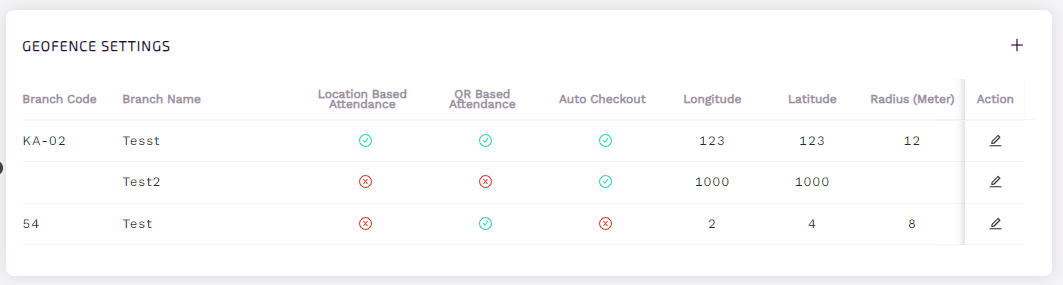
Geofence Settings
○ To add multiple branch locations, you can add from this section.
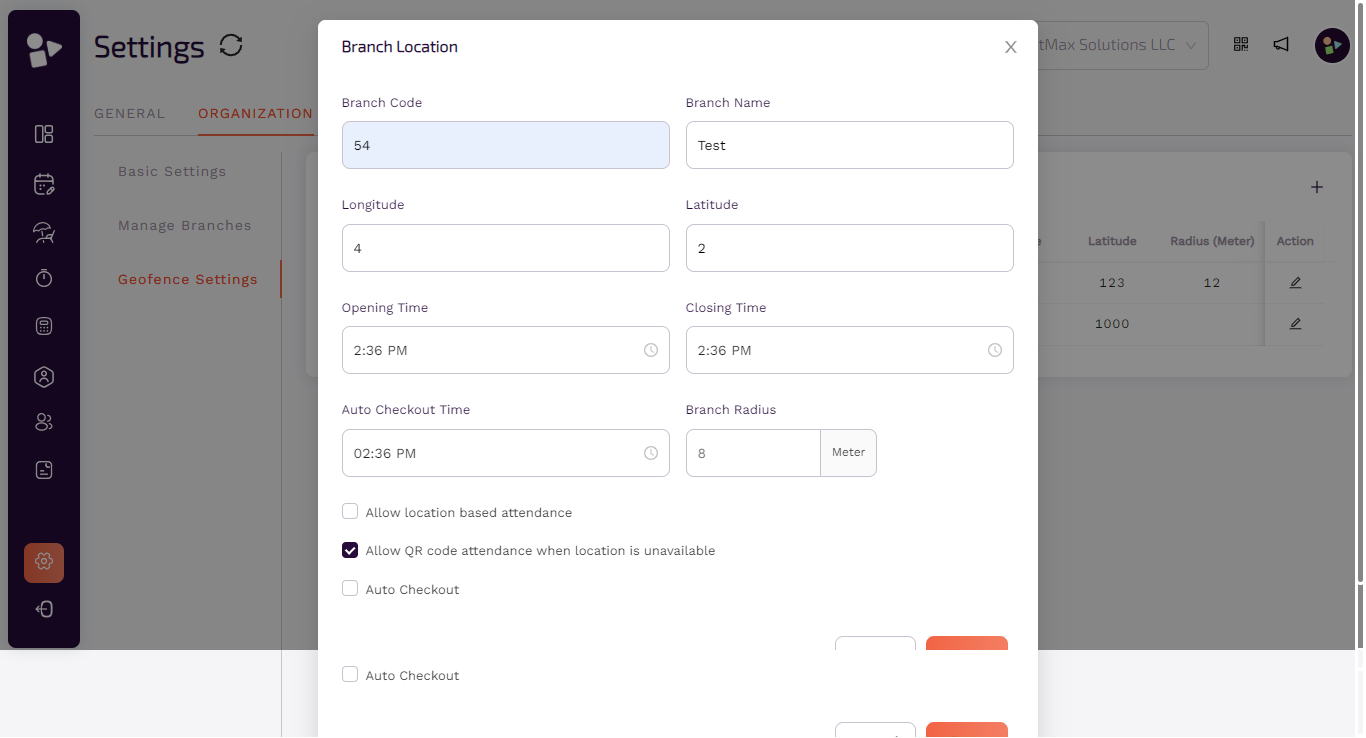
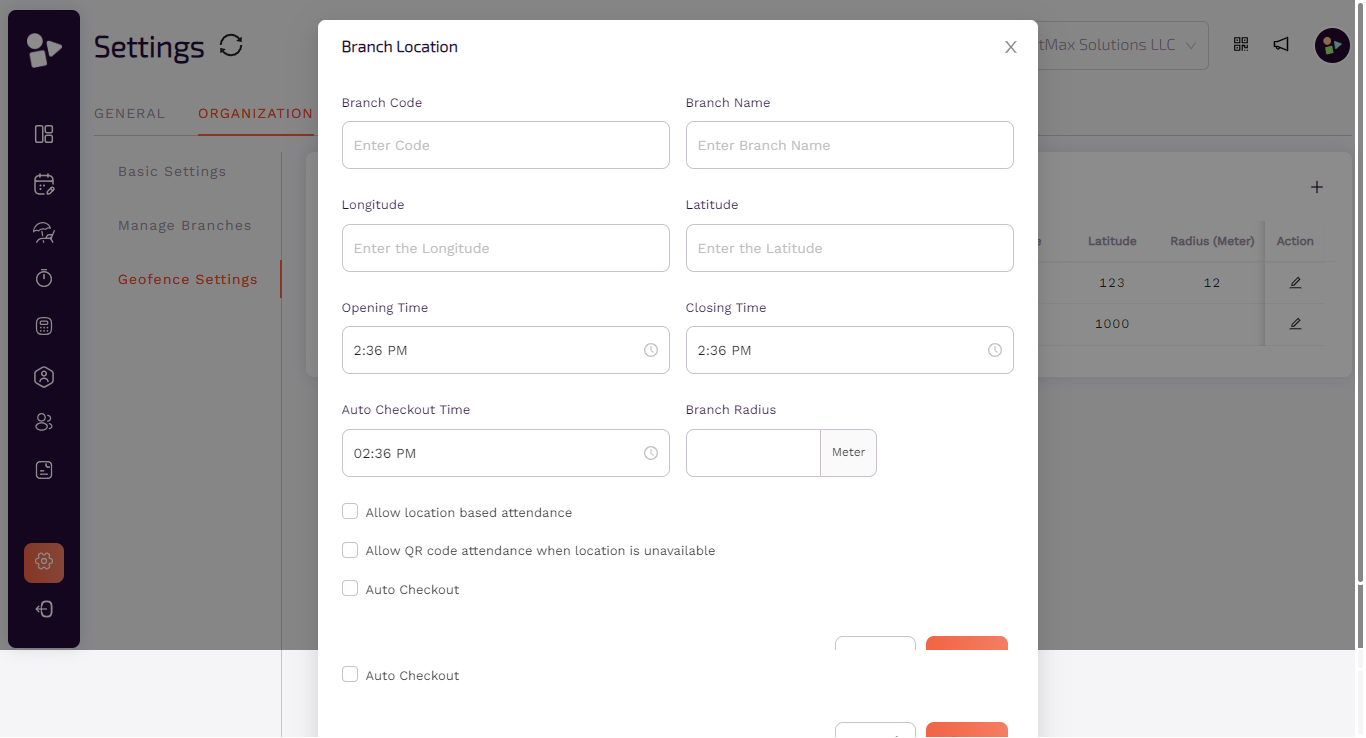
○ Click on the add icon to add a new branch location.
○ Enter code, name, longitude, latitude, opening and closing time, auto checkout time and radius of branch.
○ Using checkbox, admin can allow location-based attendance, QR code attendance when location is unavailable and auto checkout
○ Click on save to make changes.
Work Policy
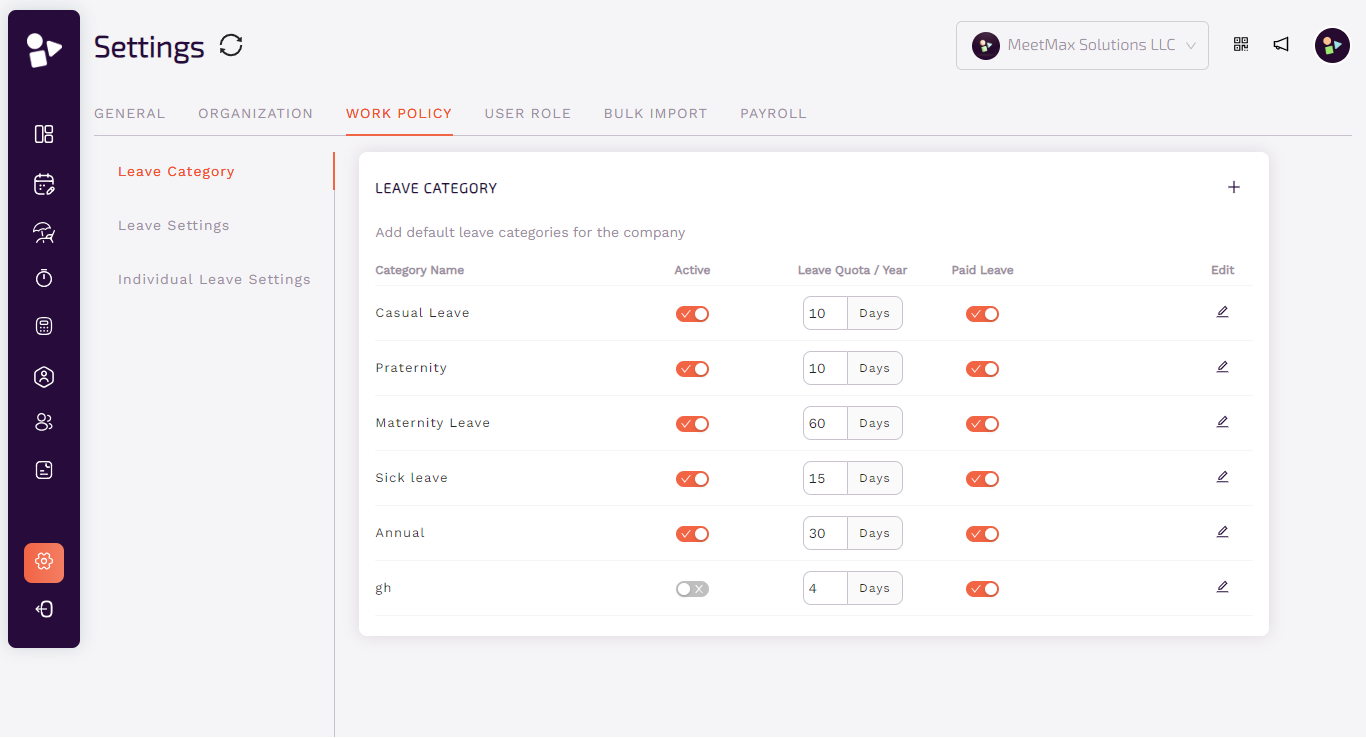
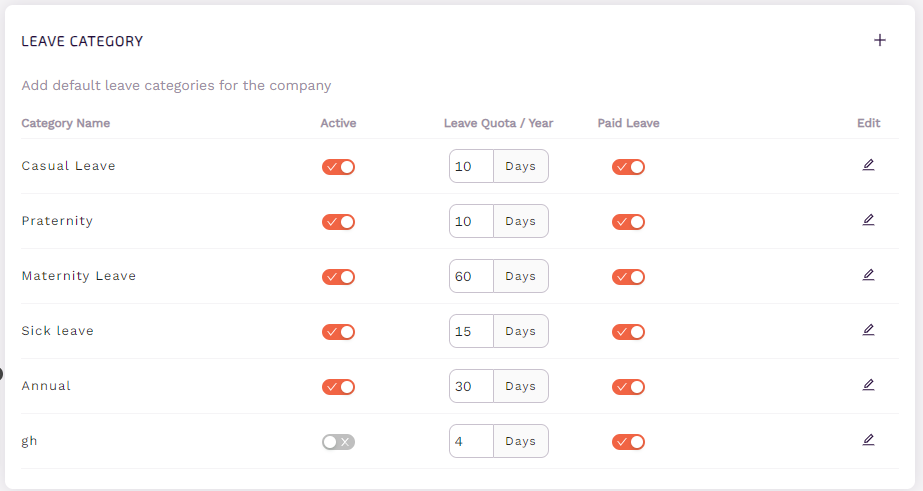
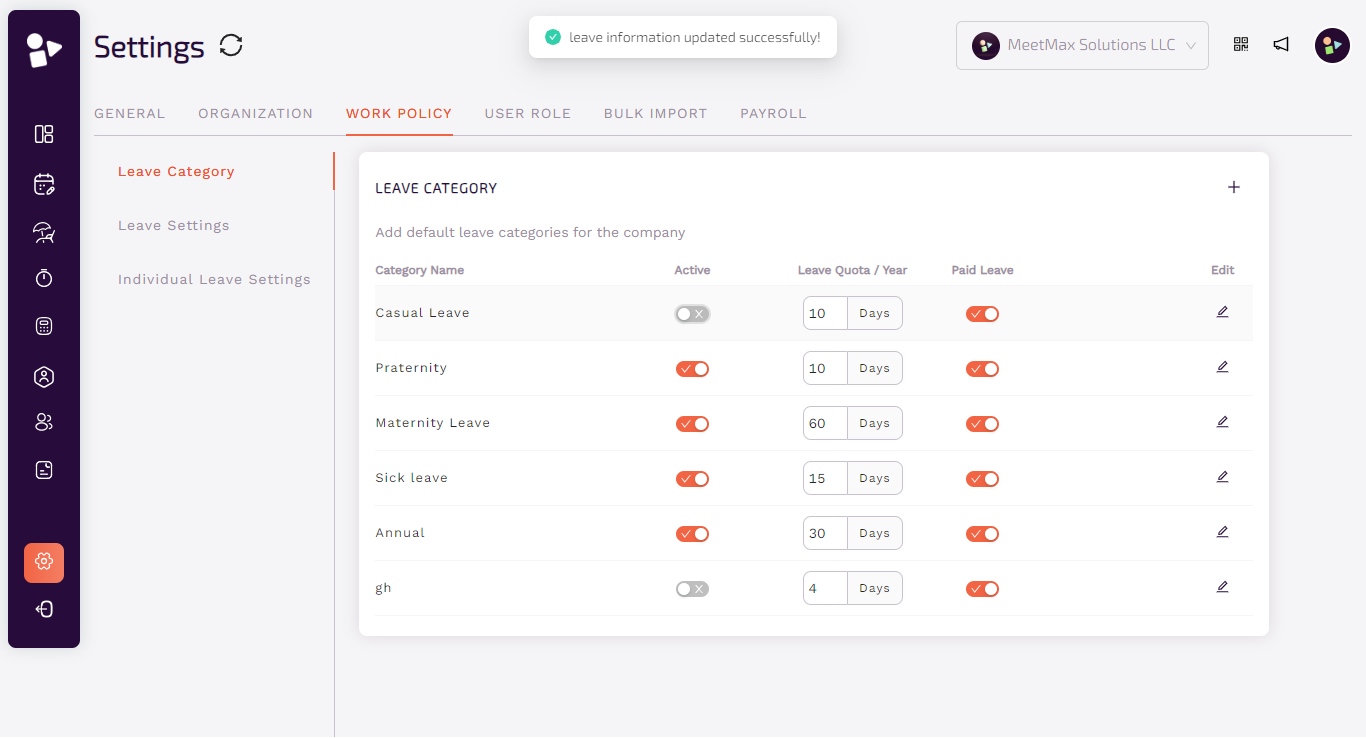
Leave Category
○ Click to add a new leave category.
○ Make changes using radio buttons such as activating leave category or choose paid leaves.
○ Make changes using radio buttons such as activating leave category or choose paid leaves.

Leave Settings
○ Using checkbox, admin can allow if an employee requires approval from the respective manager instead of Meet Max admin as well as the public holidays in your region from leaves will not count or not.
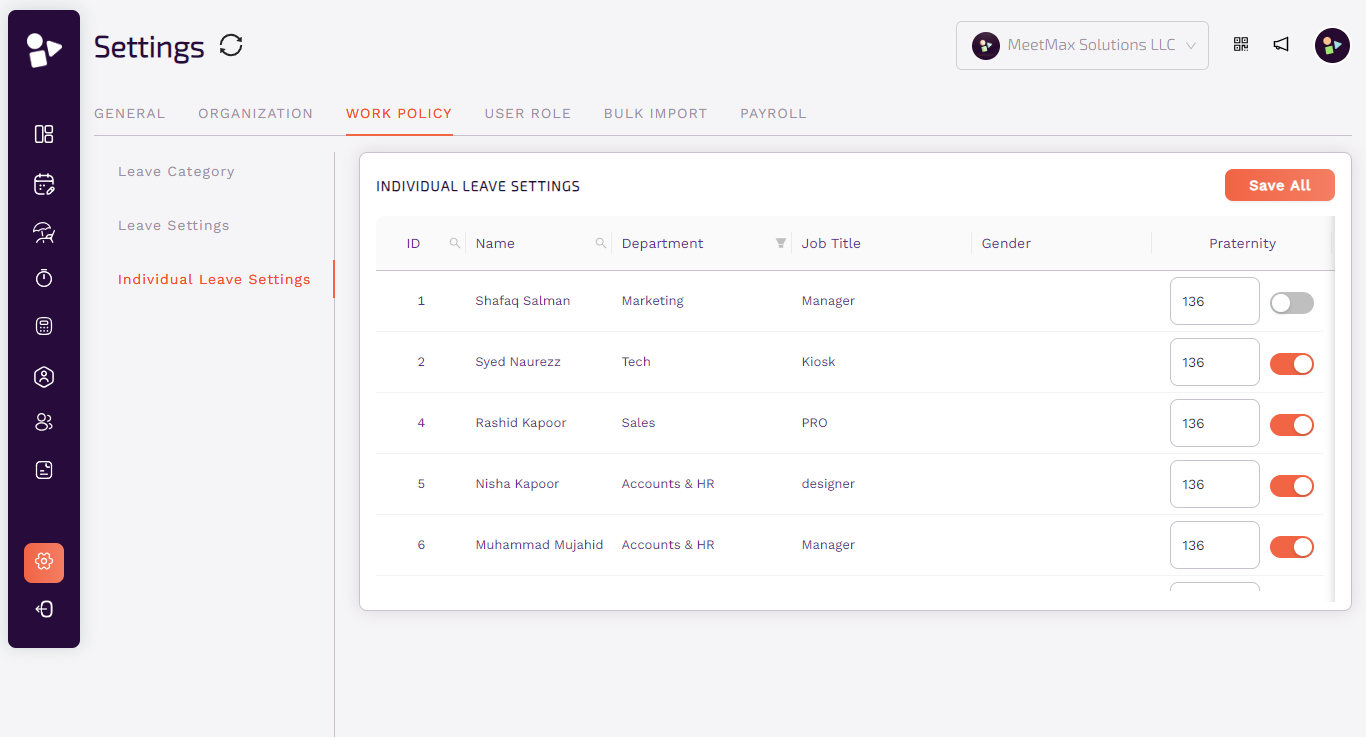
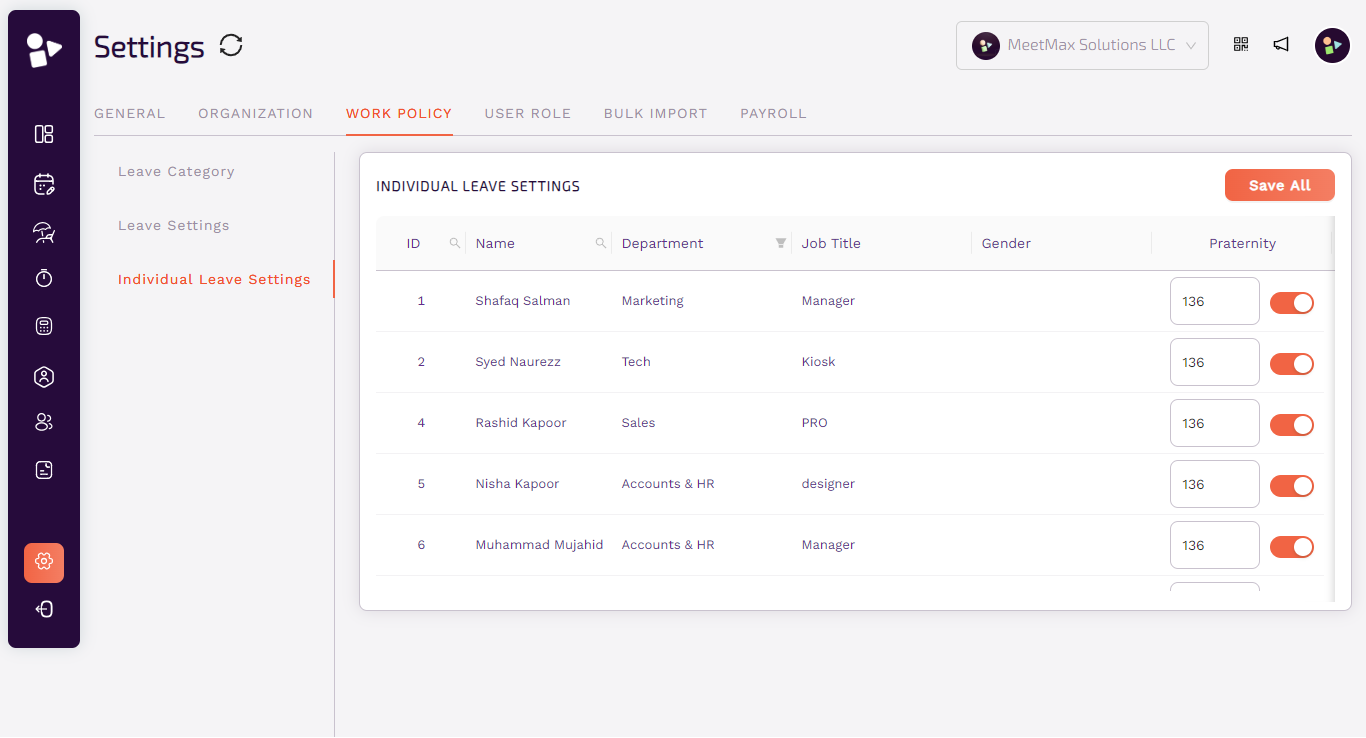
Individual Leave Settings
○ This shows individual leaves of each employee.
○ Admin have rights to limit leave type or days allowed to that category.
○ Admin have rights to limit leave type or days allowed to that category.
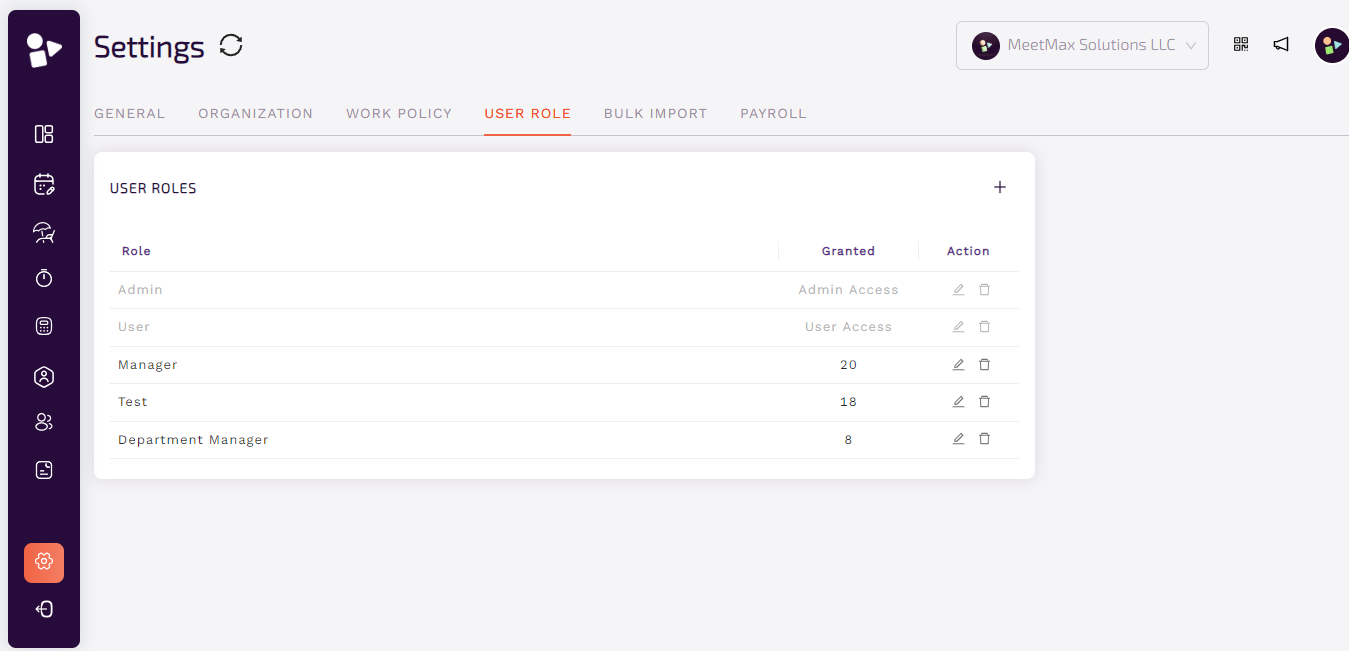
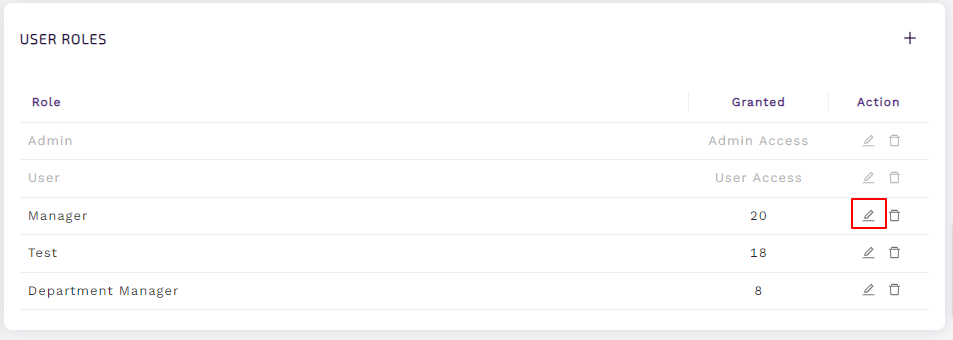
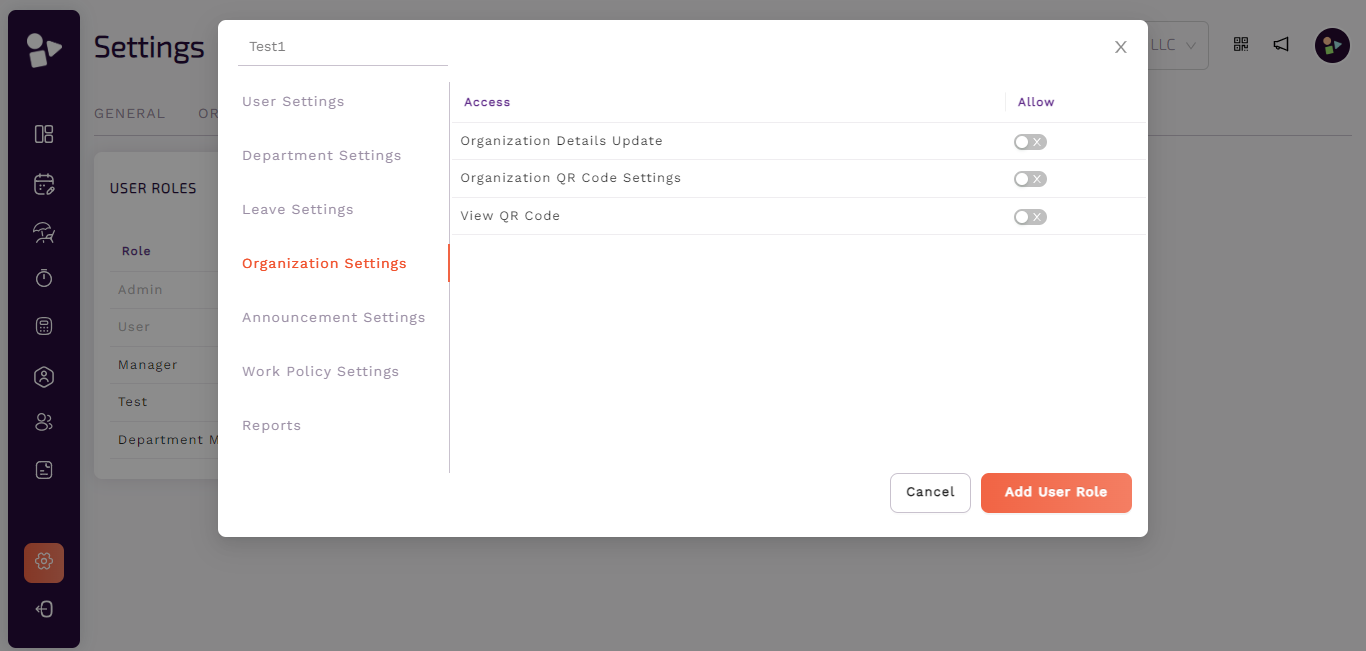
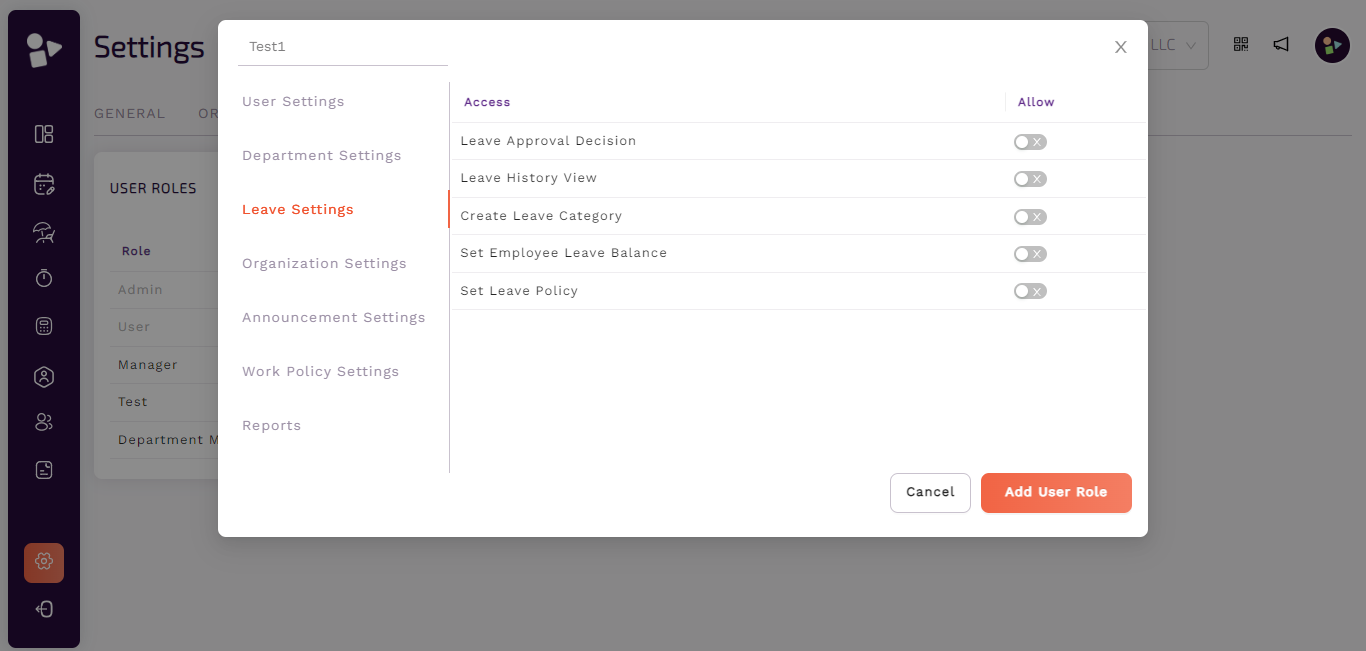
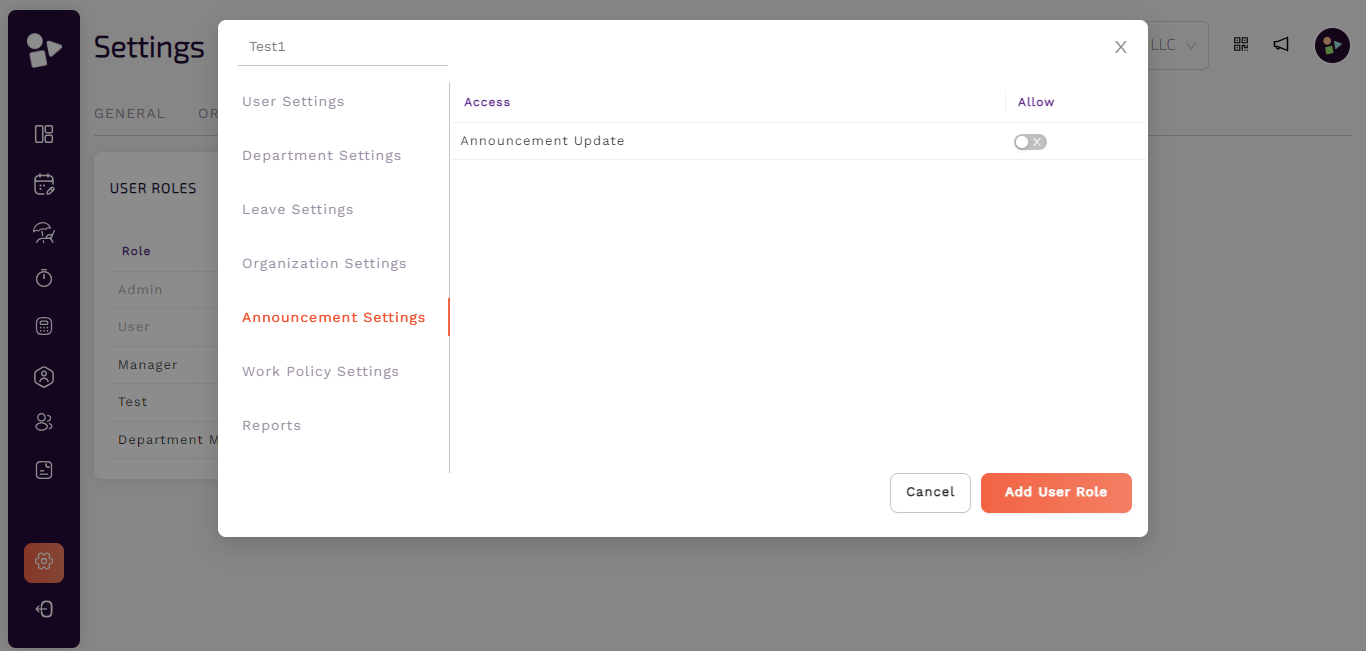
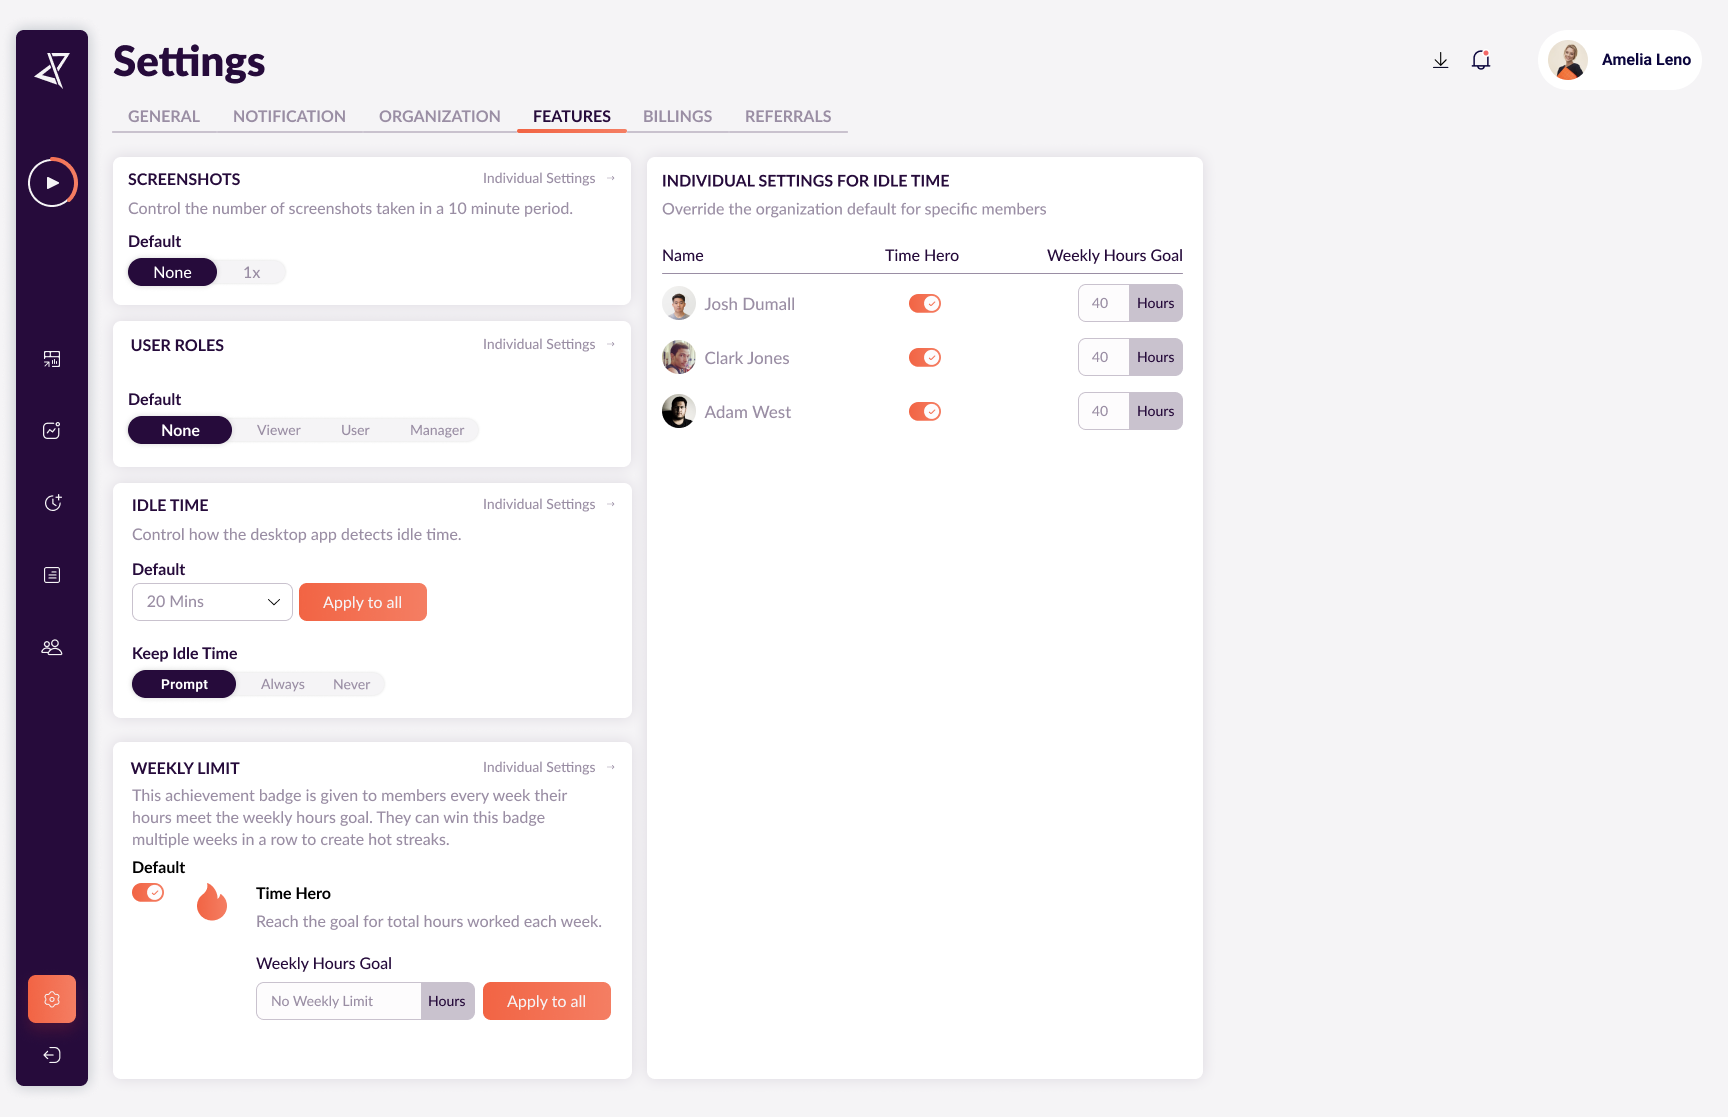
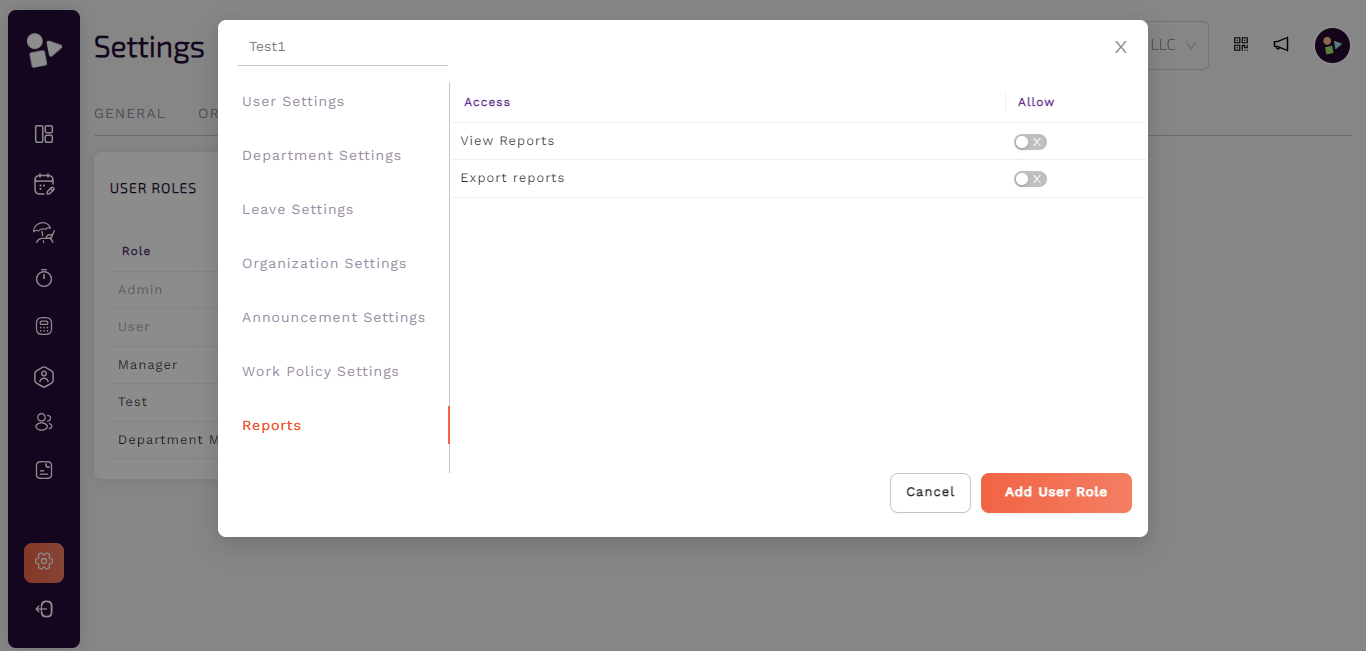
User Role
● Admin can manage roles of other users such as managers.
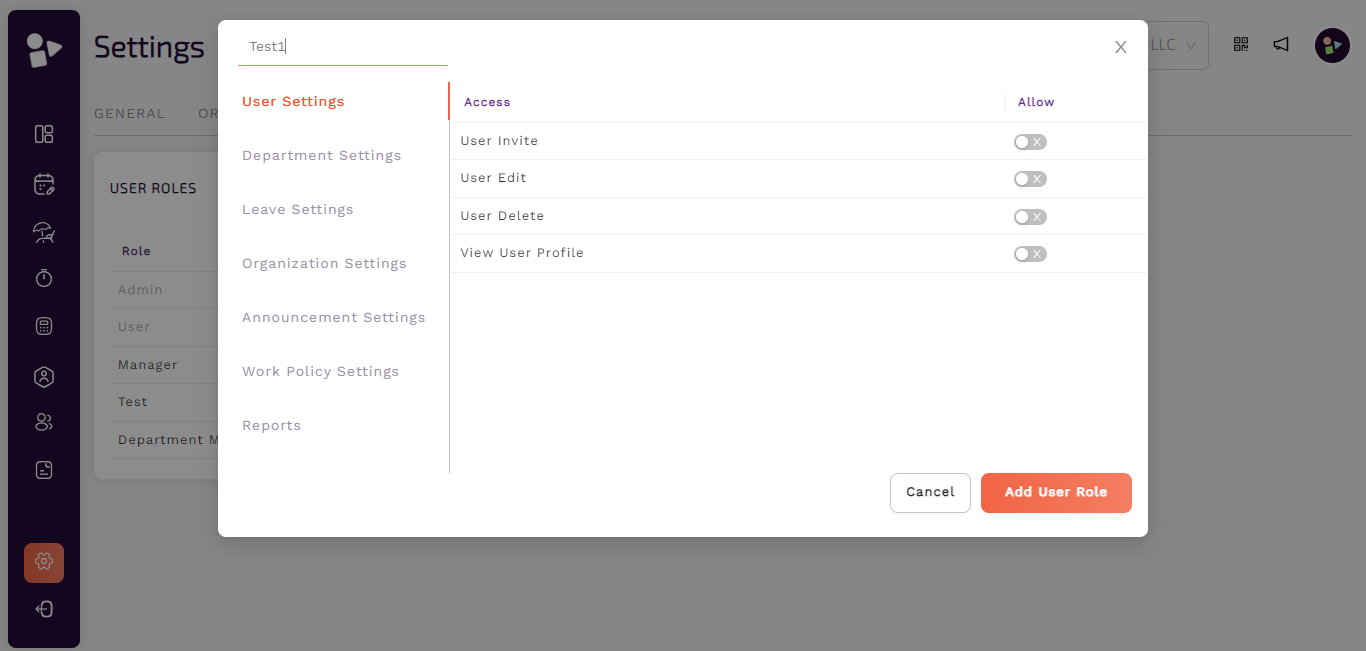
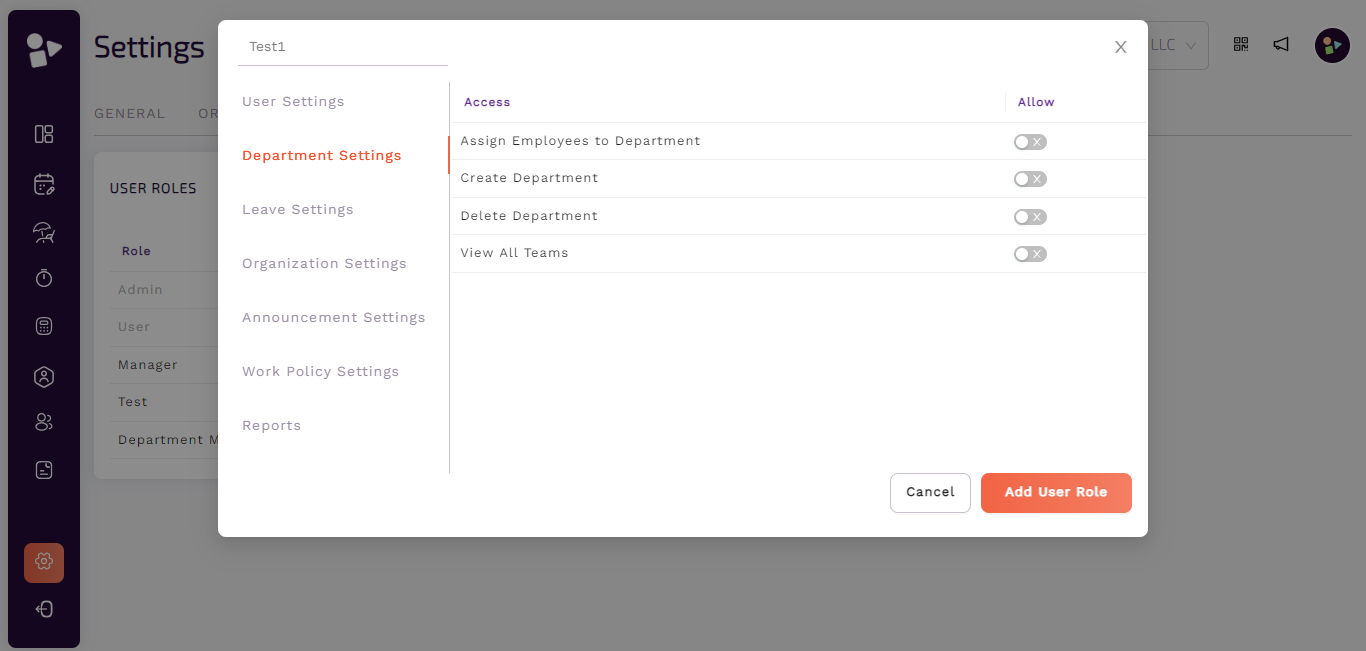
● Click on the icon to add a new role.
● Add role name and allow desired rights to the new role for the following such as user, department, leave, organization, announcement, work policy settings and reports.
● The given rights can be edited later.
● Click on the icon to add a new role.
● Add role name and allow desired rights to the new role for the following such as user, department, leave, organization, announcement, work policy settings and reports.
● The given rights can be edited later.


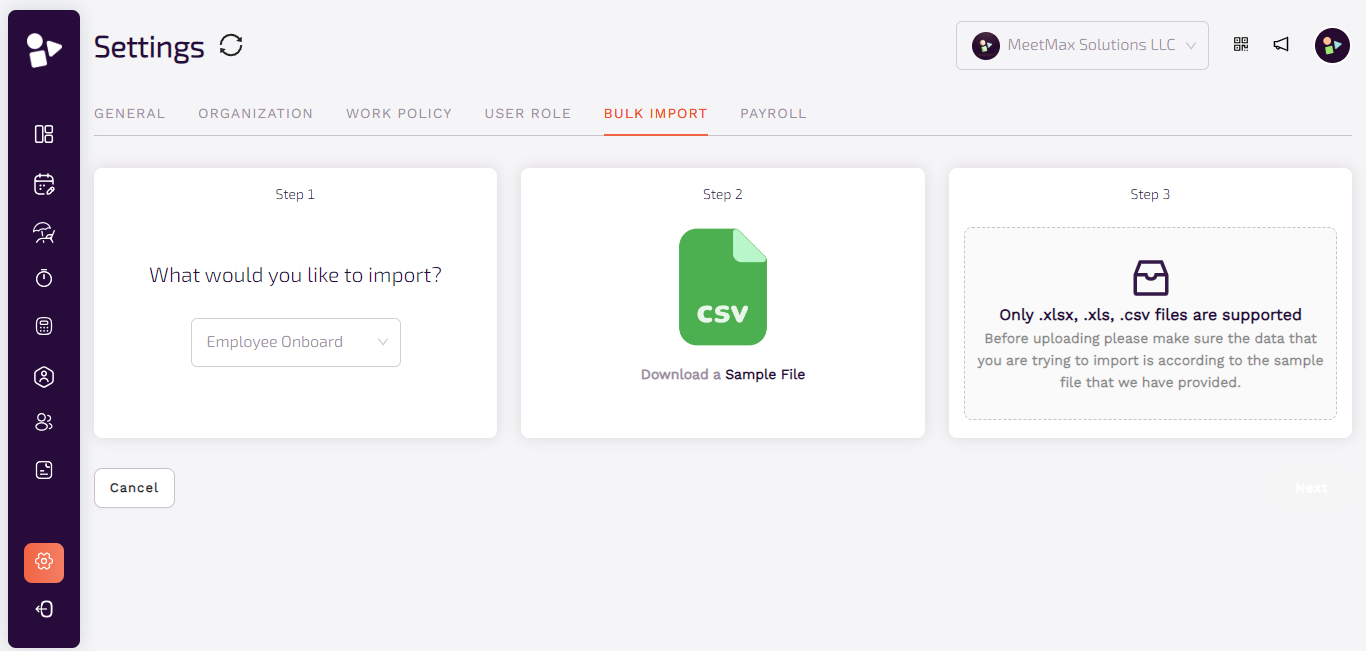
Bulk Import
● Admin can also import bulk data using 3 simple steps.
● Choose the import category, download sample files and upload data according to the sample.
● Save to import data.
● Choose the import category, download sample files and upload data according to the sample.
● Save to import data.
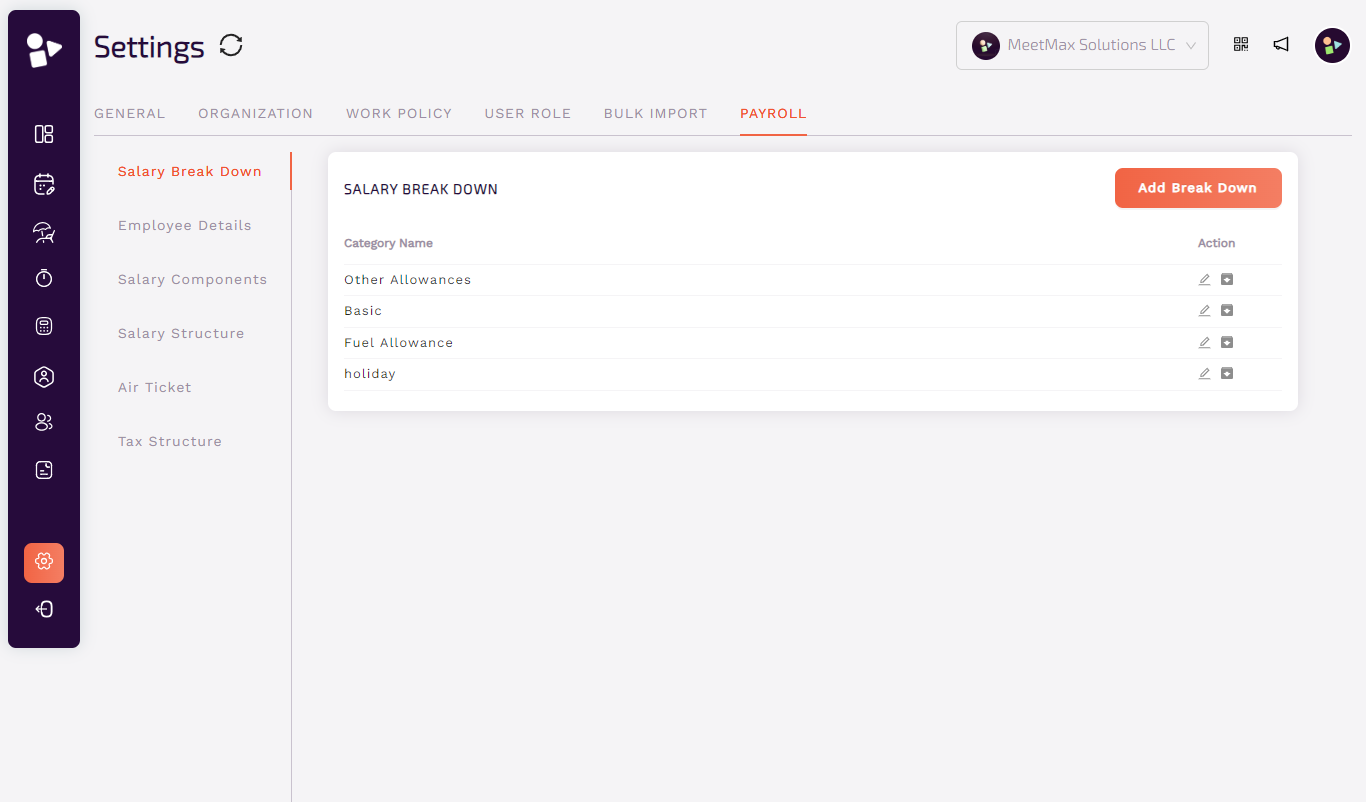
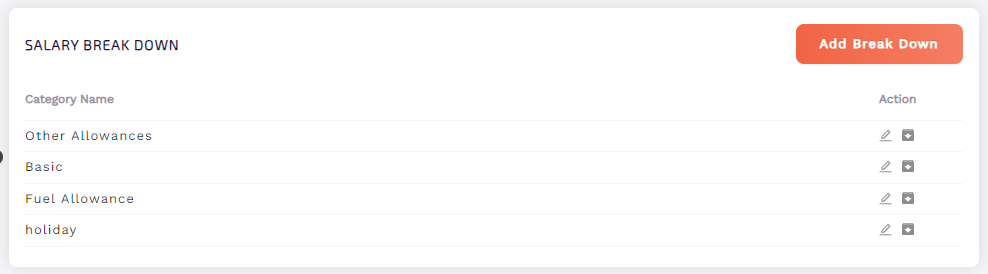
Payroll
● Salary Breakdown
○ Add a new salary breakdown category name.
○ Names can be edited or archived.
○ Add a new salary breakdown category name.
○ Names can be edited or archived.


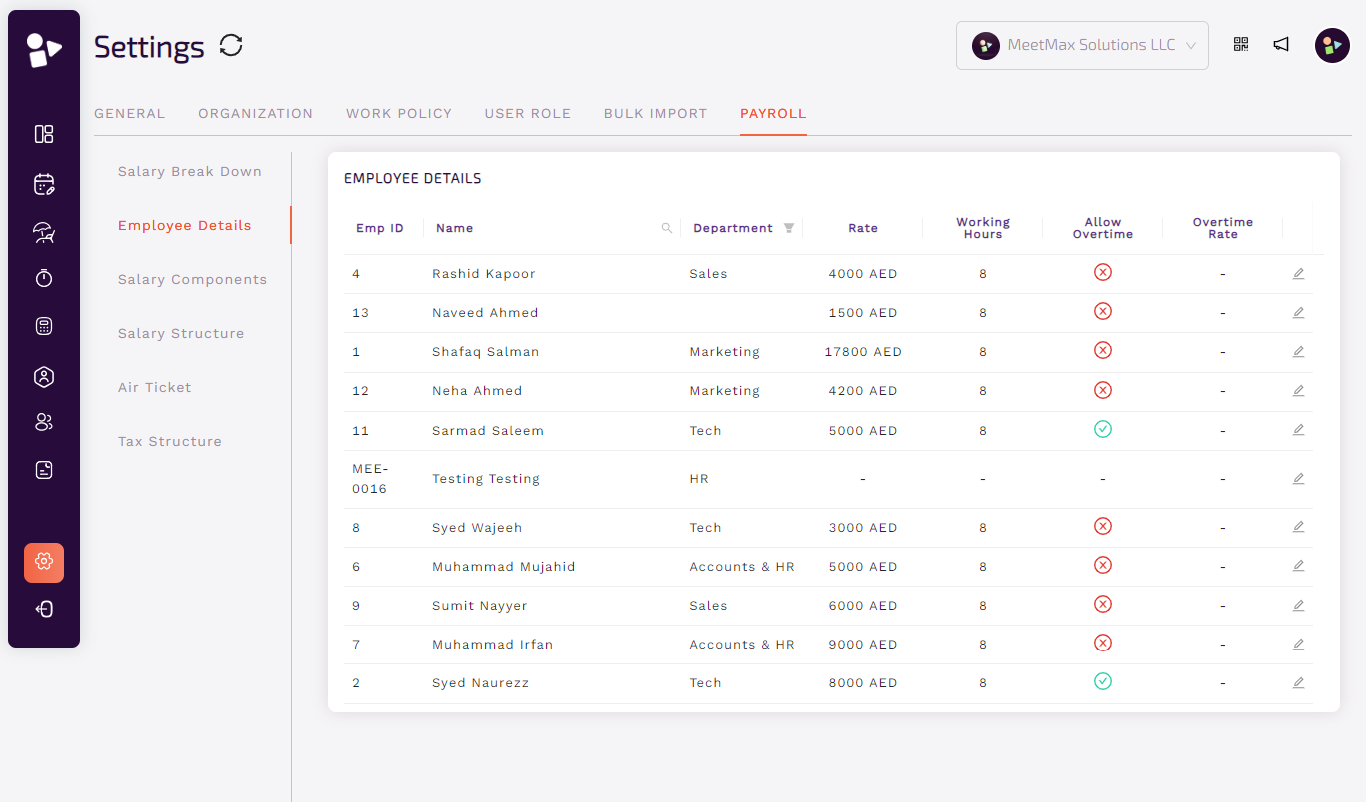
Employee Details
○ Edit employee
● Click on edit employee.
● You will first view employee’s information like name, email and designation. Only name and designation fields can be edited from the information section.
● Secondly, you will view roles. Admin can change the role of the employee by clicking on the dropdown and choosing available options.
● Click on save to update any employee detail changes that you made.
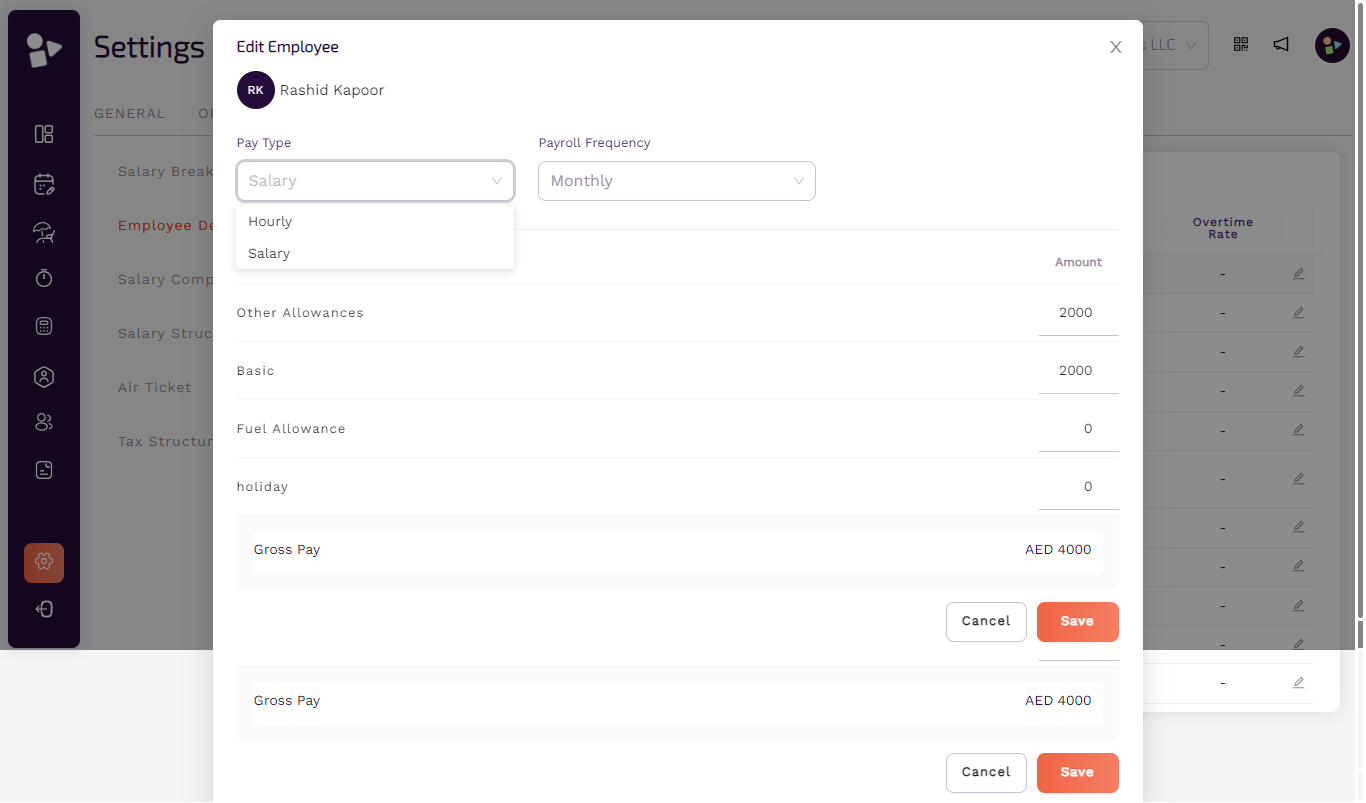
Edit employee payroll
● Click on edit employee payroll.
● Popup open to edit employee payroll.
● Choose salary type
○ Default
○ Hourly
○ Salary
● Choose payroll frequency
○ Default
○ Daily
○ Weekly
○ Monthly
○ Yearly
● Set regular hours as required.
● Choose overtime pay type
○ Disabled
○ Flat rate
■ Add overtime regular and weekend rate manually
○ Dynamic
■ Choose basic or other allowances for regular and weekend overtime
● Edit salary breakdown
○ Edit overtime regular and weekend rate manually.
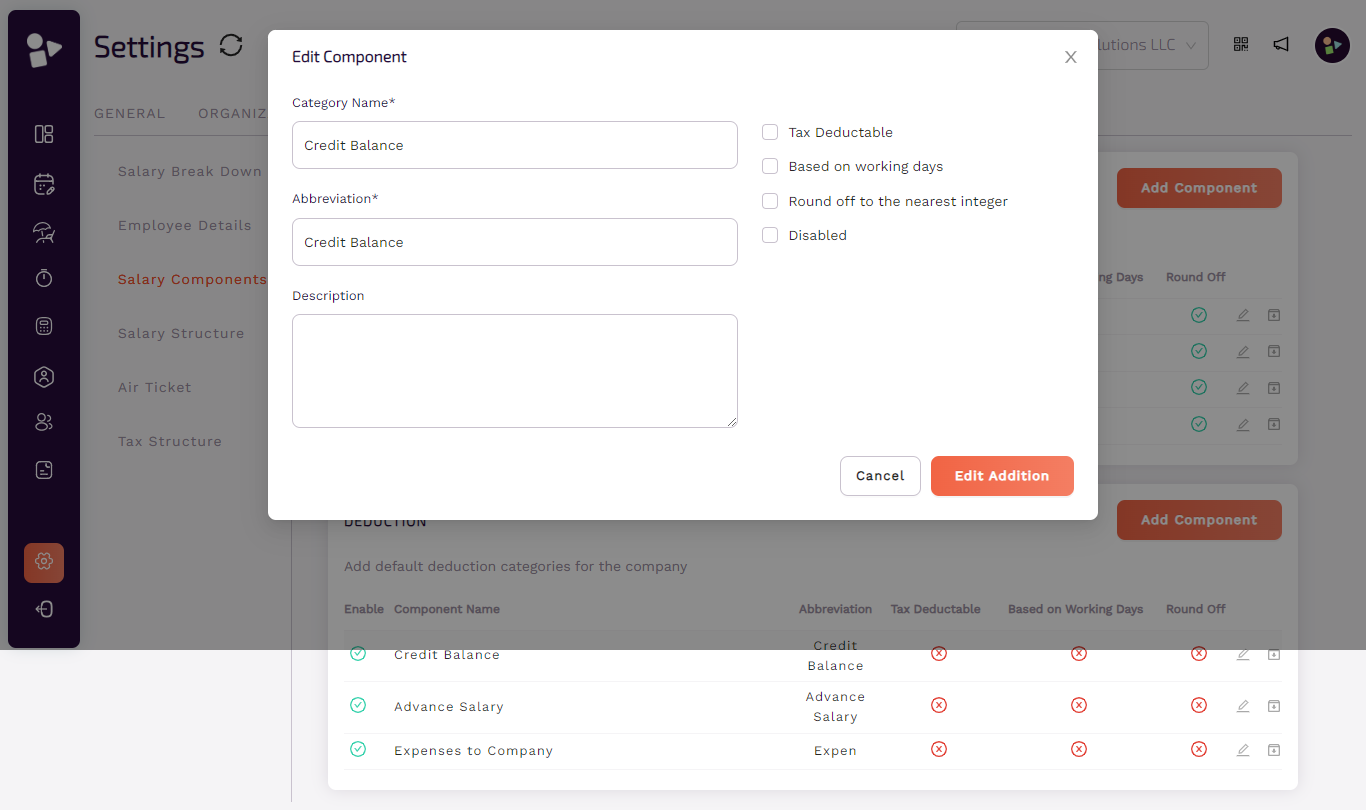
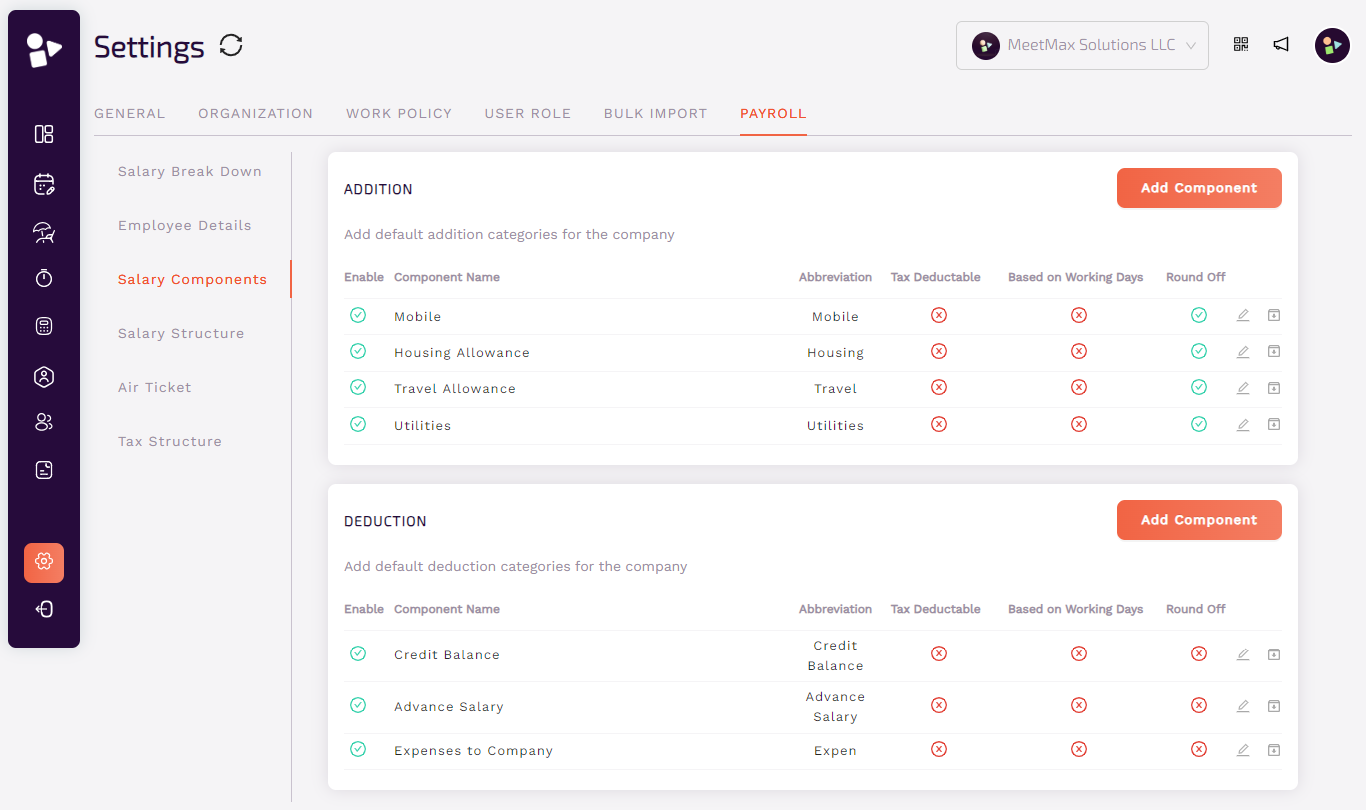
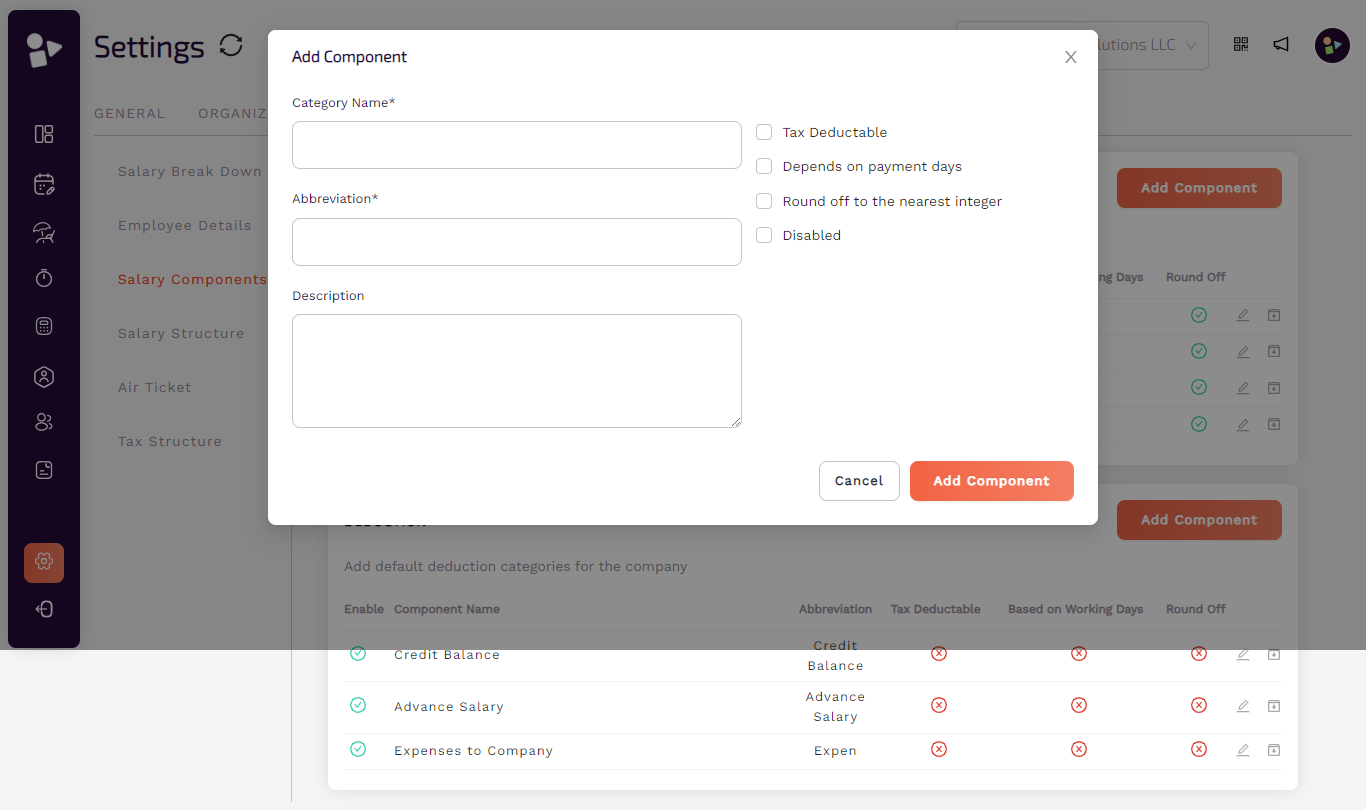
Salary Components
○ Admin can add addition and deduction categories in this component.
○ Add details such as name, abbreviation, and description.
○ Click on add components to add a new one.
○ Click on save to make changes.
○ Click on to make changes or archive to delete.
○ Add details such as name, abbreviation, and description.
○ Click on add components to add a new one.
○ Click on save to make changes.
○ Click on to make changes or archive to delete.
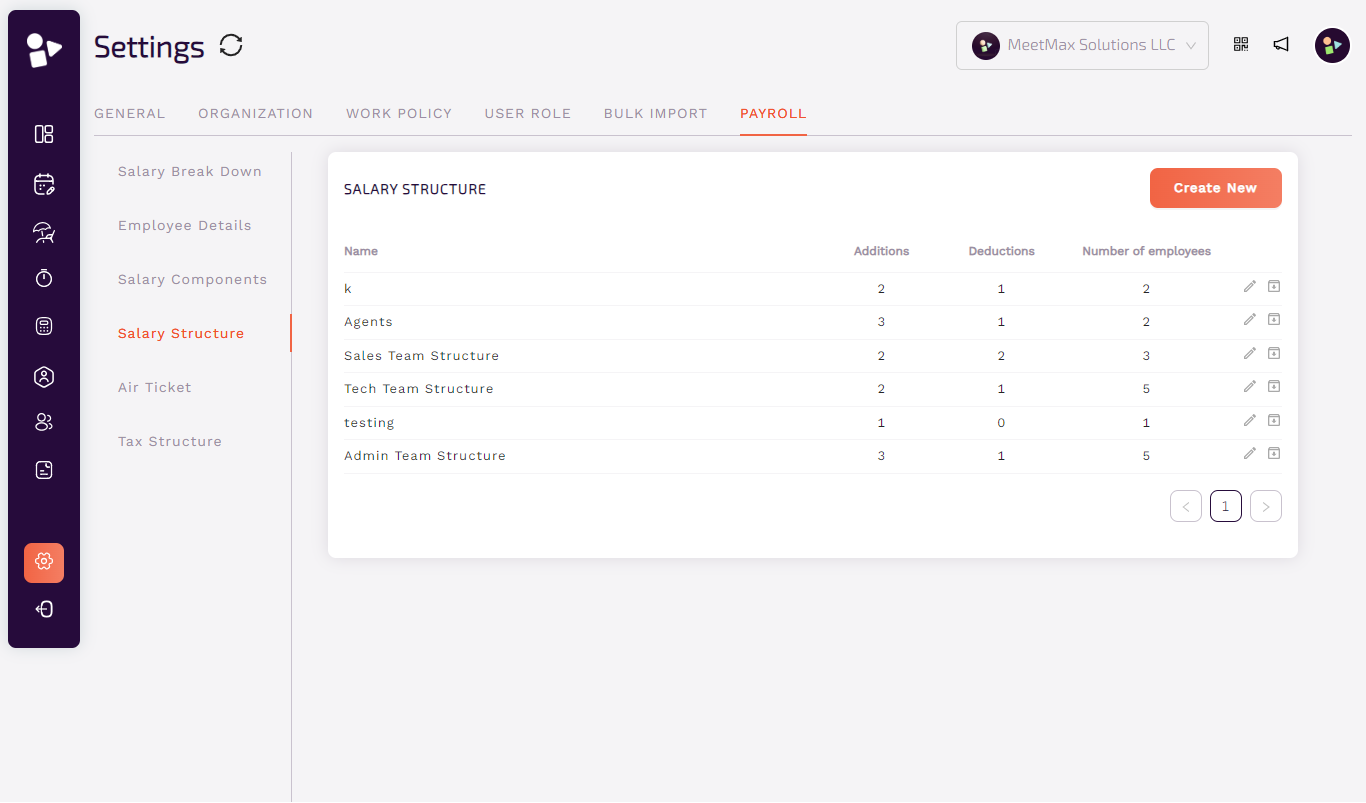
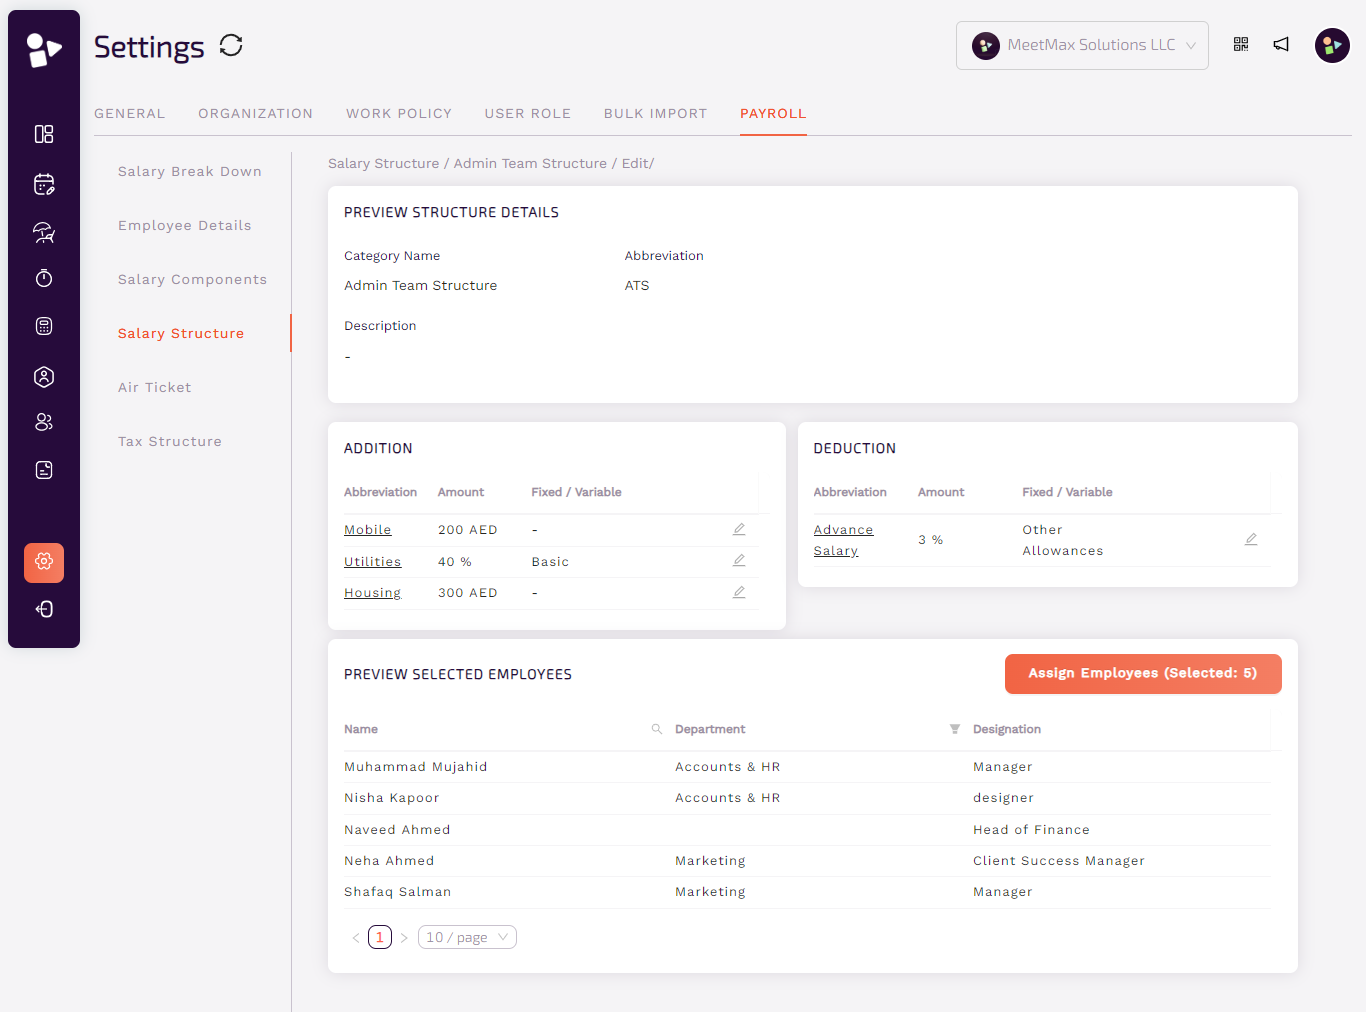
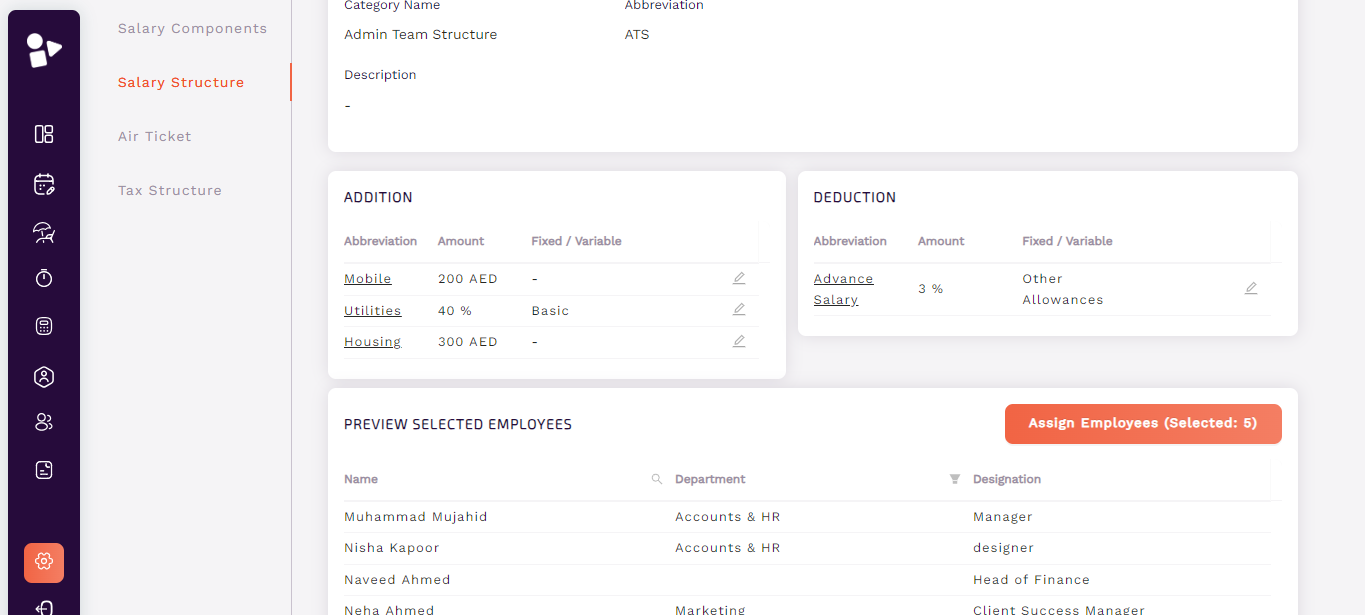
Salary Structure
○ Admin can add a new salary structure, for this click on create new.
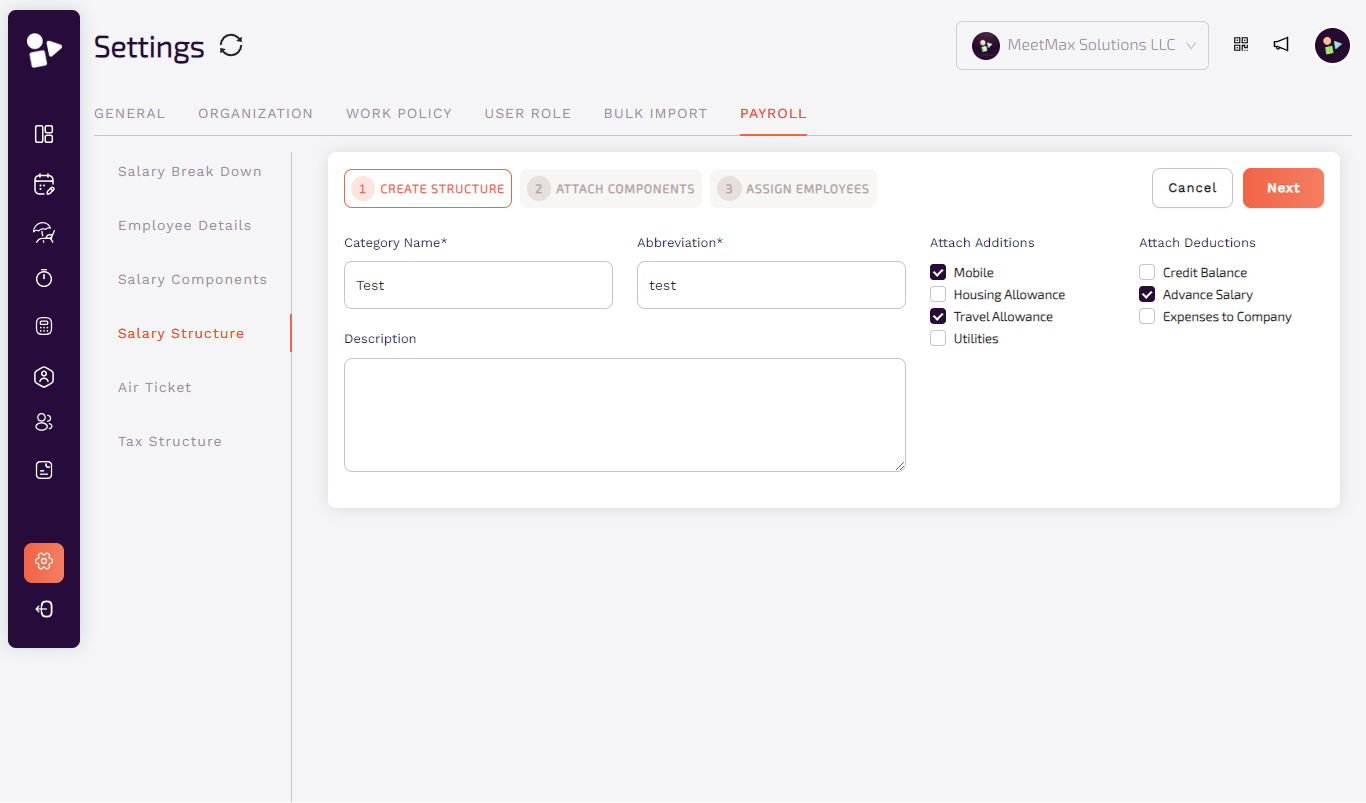
Create structure
● Add details such as name, abbreviation, and description.
● Choose addition and deduction categories from the given.
● Click on next.
● Choose addition and deduction categories from the given.
● Click on next.
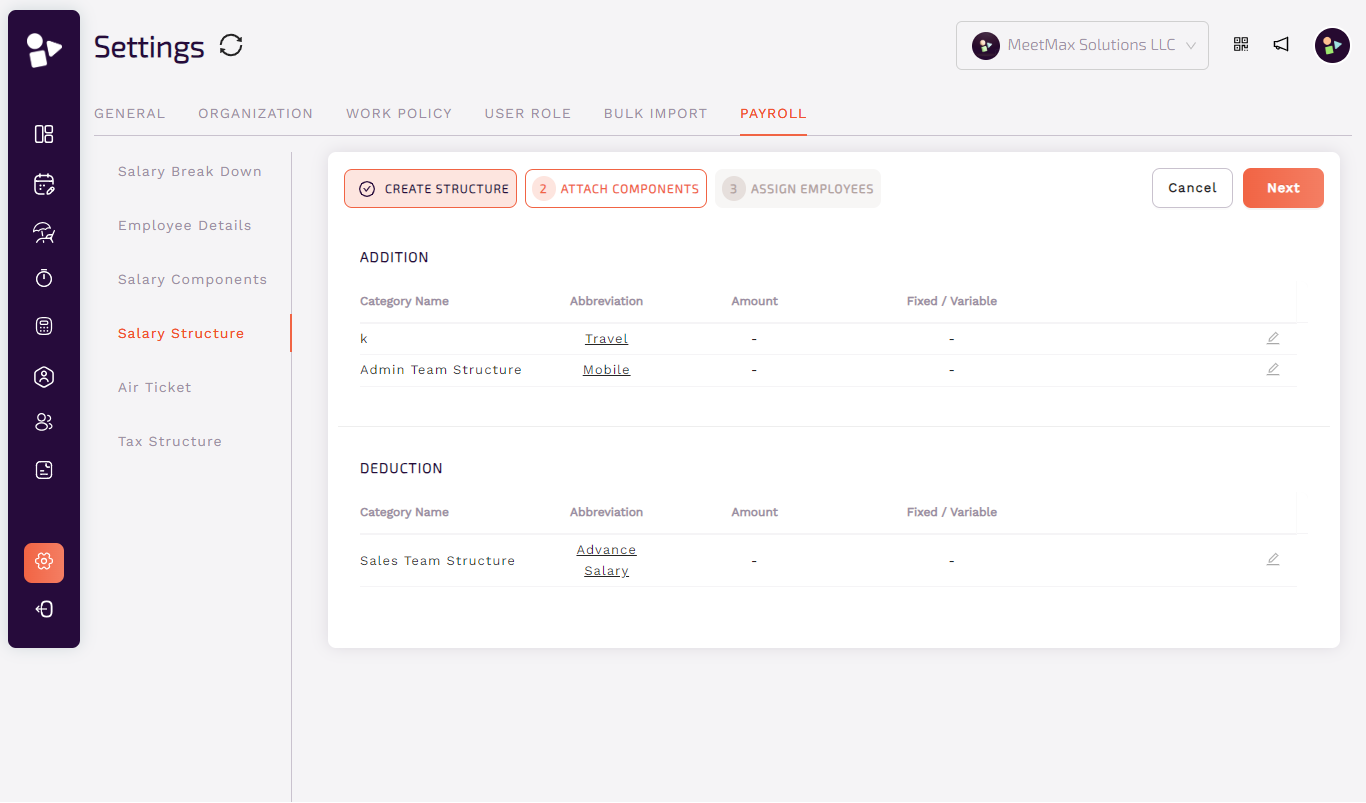
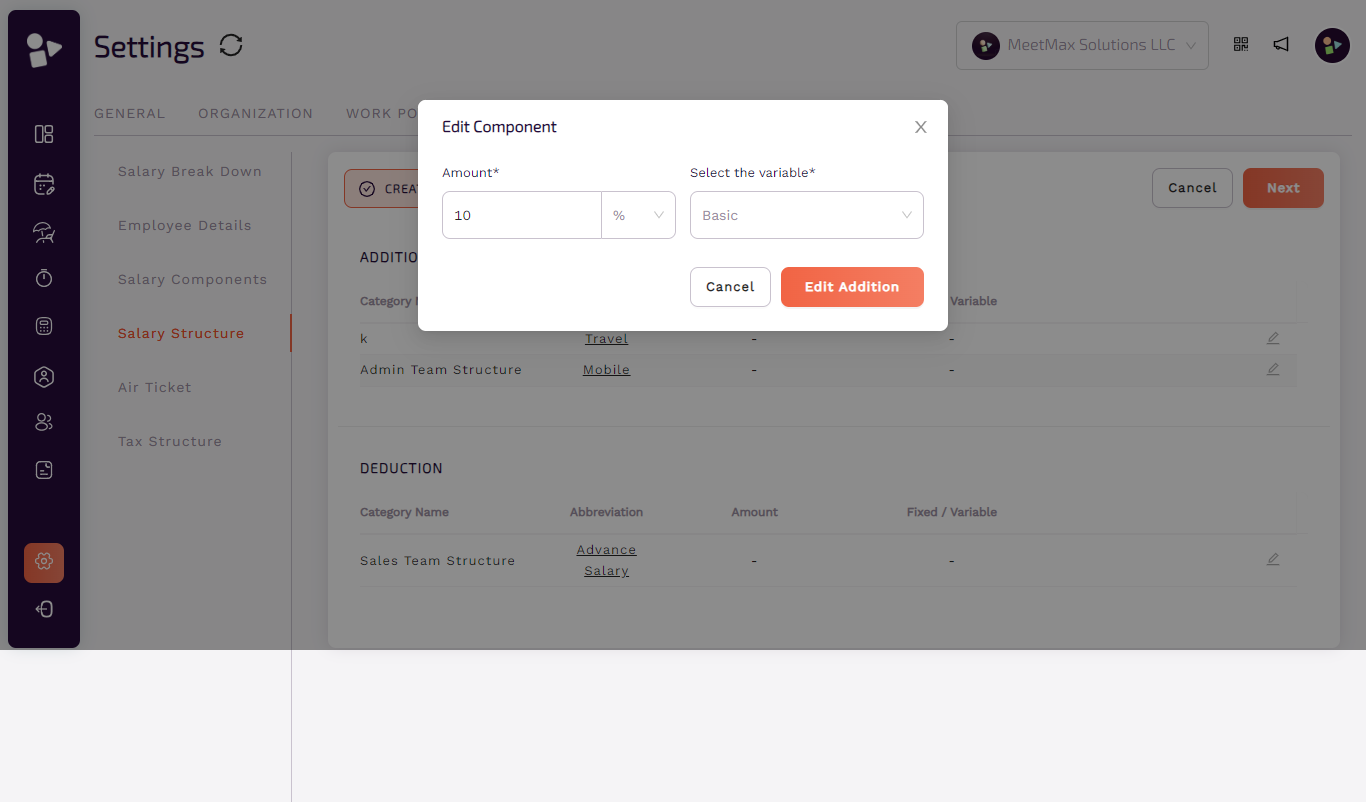
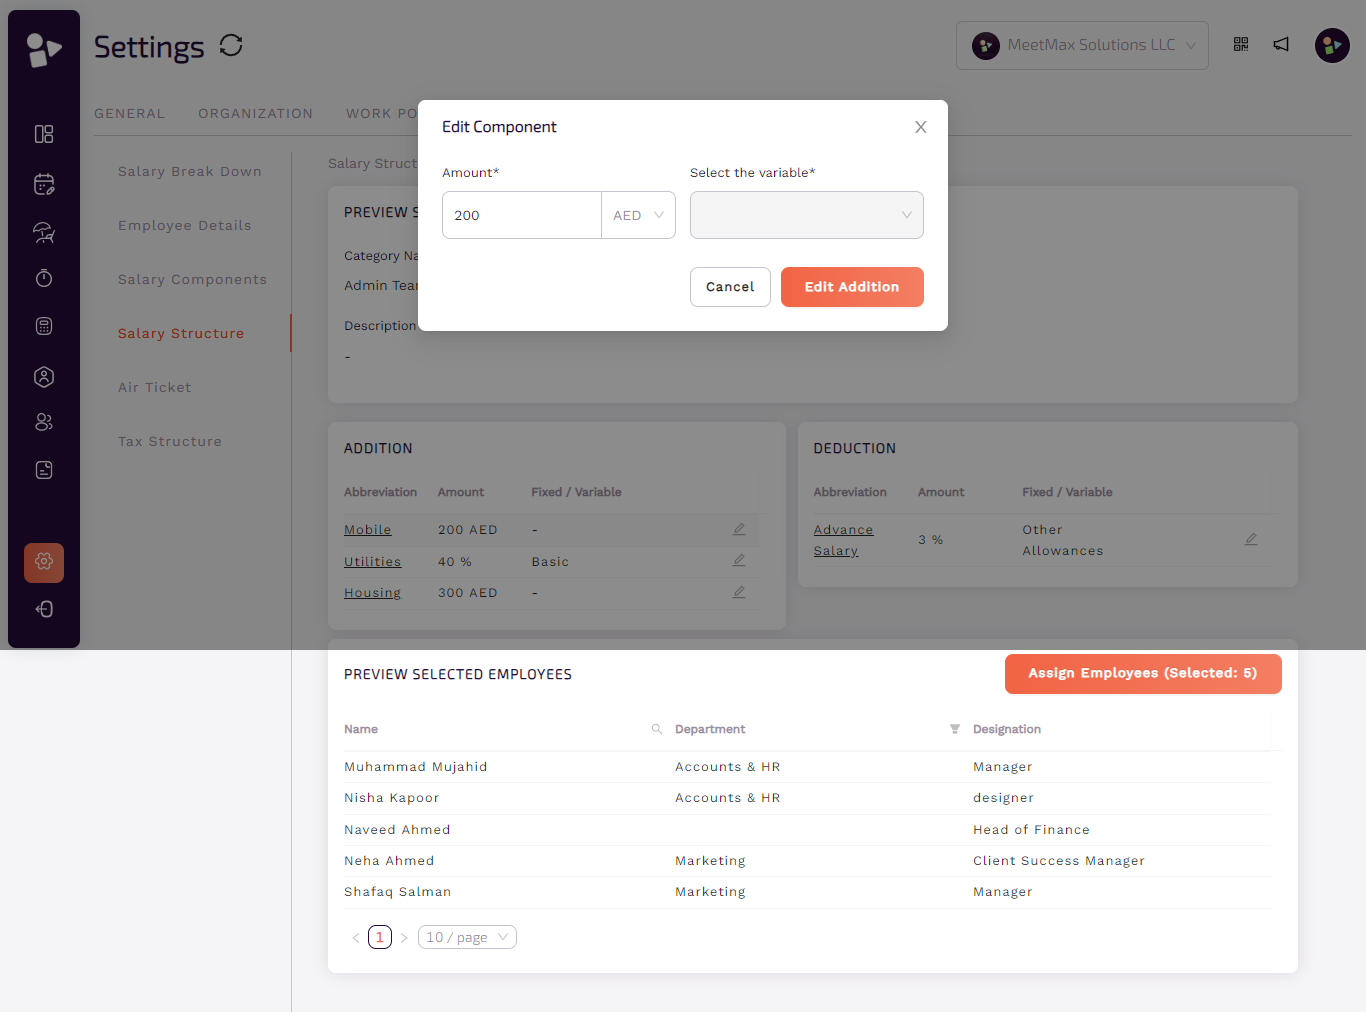
Attach components
● Edit component to attach addition.
● Add amount if currency is chosen.
● Add ratio if percent is chosen. Select variable too from the dropdown.
● Click on edit addition to save changes.
● Add amount if currency is chosen.
● Add ratio if percent is chosen. Select variable too from the dropdown.
● Click on edit addition to save changes.
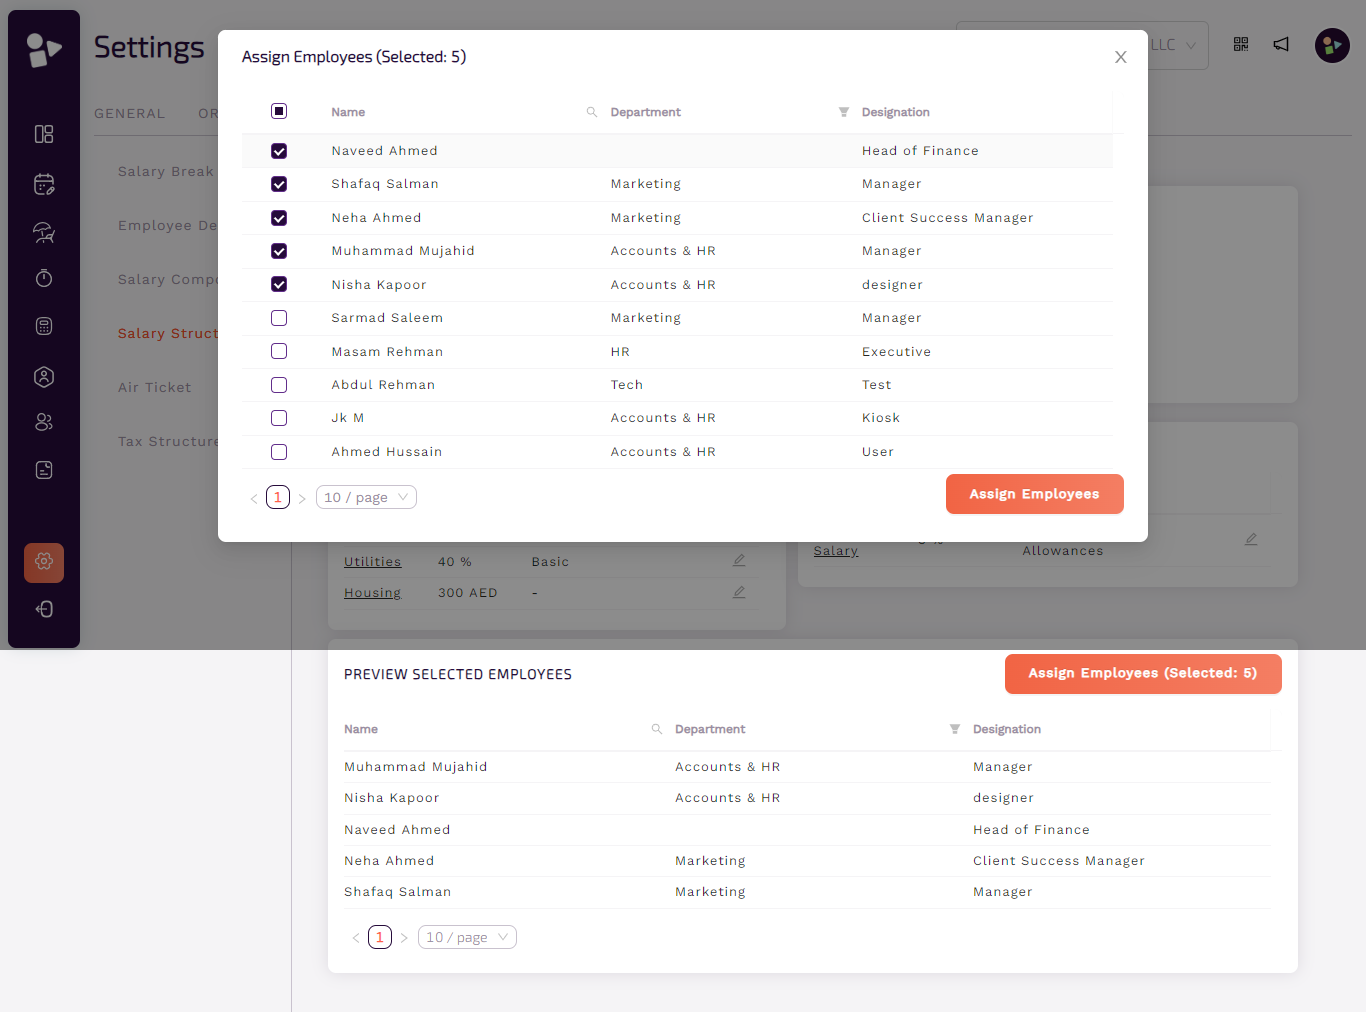
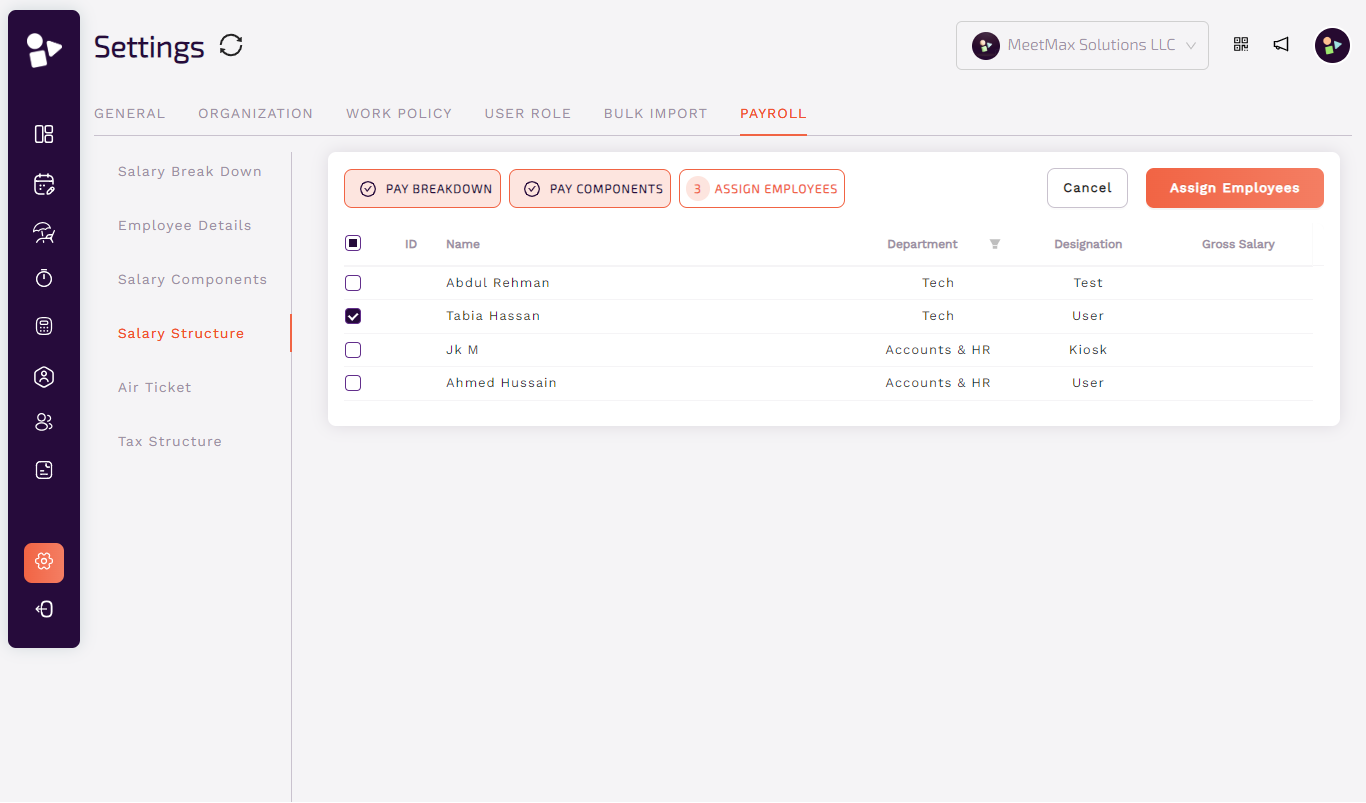
Assign employees
● Select employees from the list to assign the salary structure.
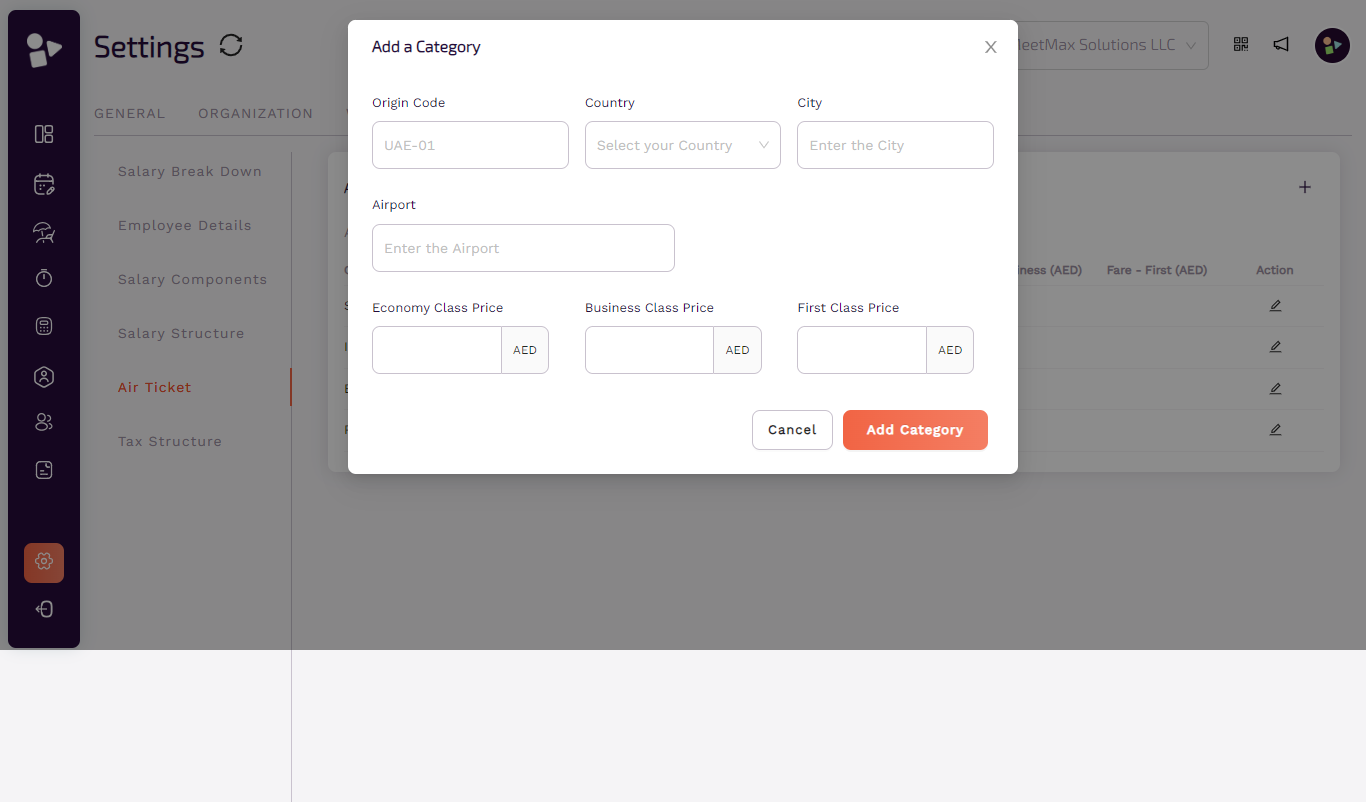
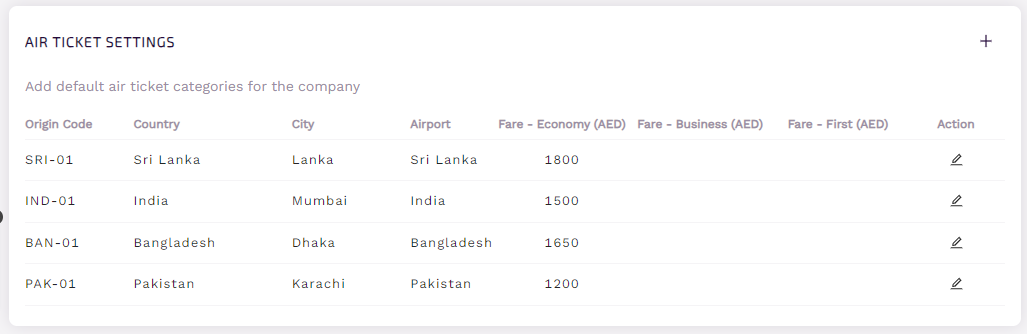
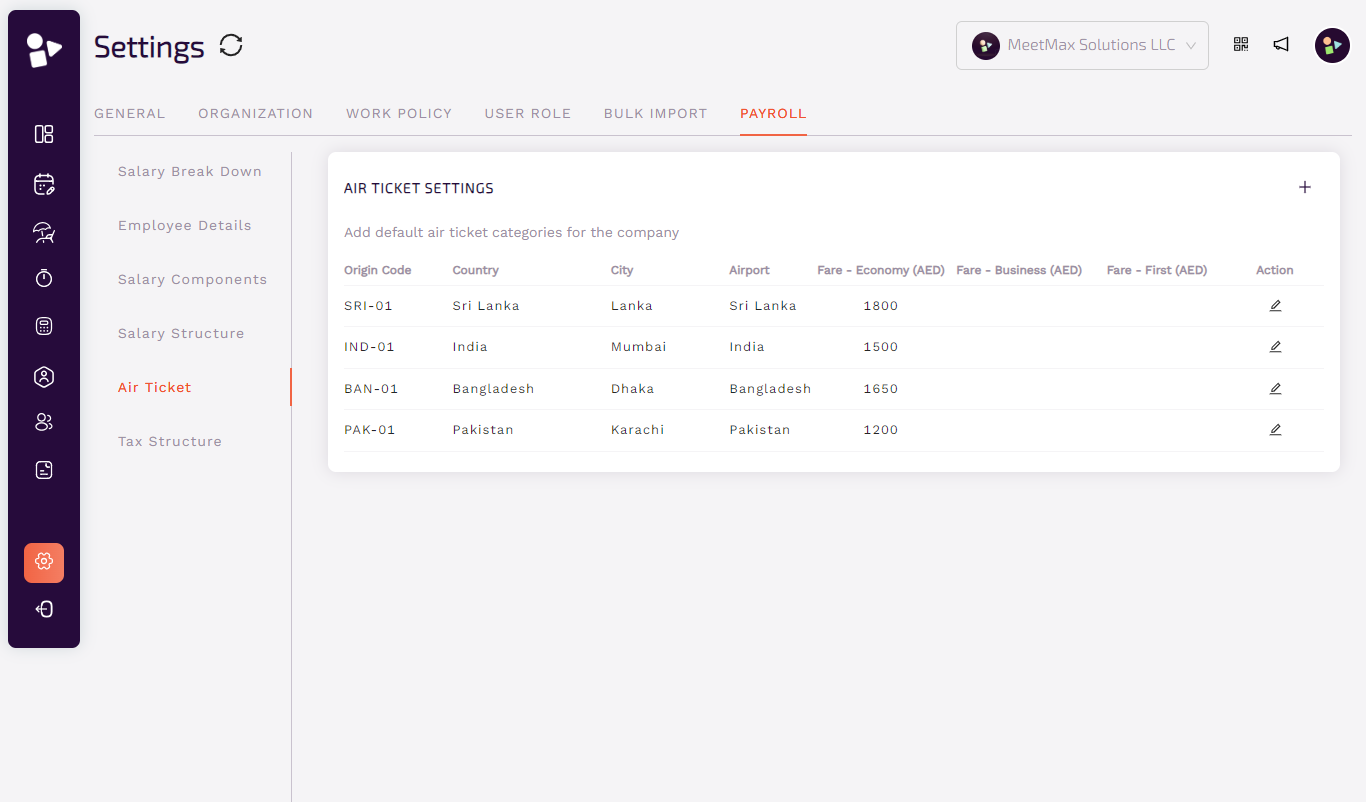
Air Ticket
○ Admin can add default air ticket categories.
○ Click on add new.
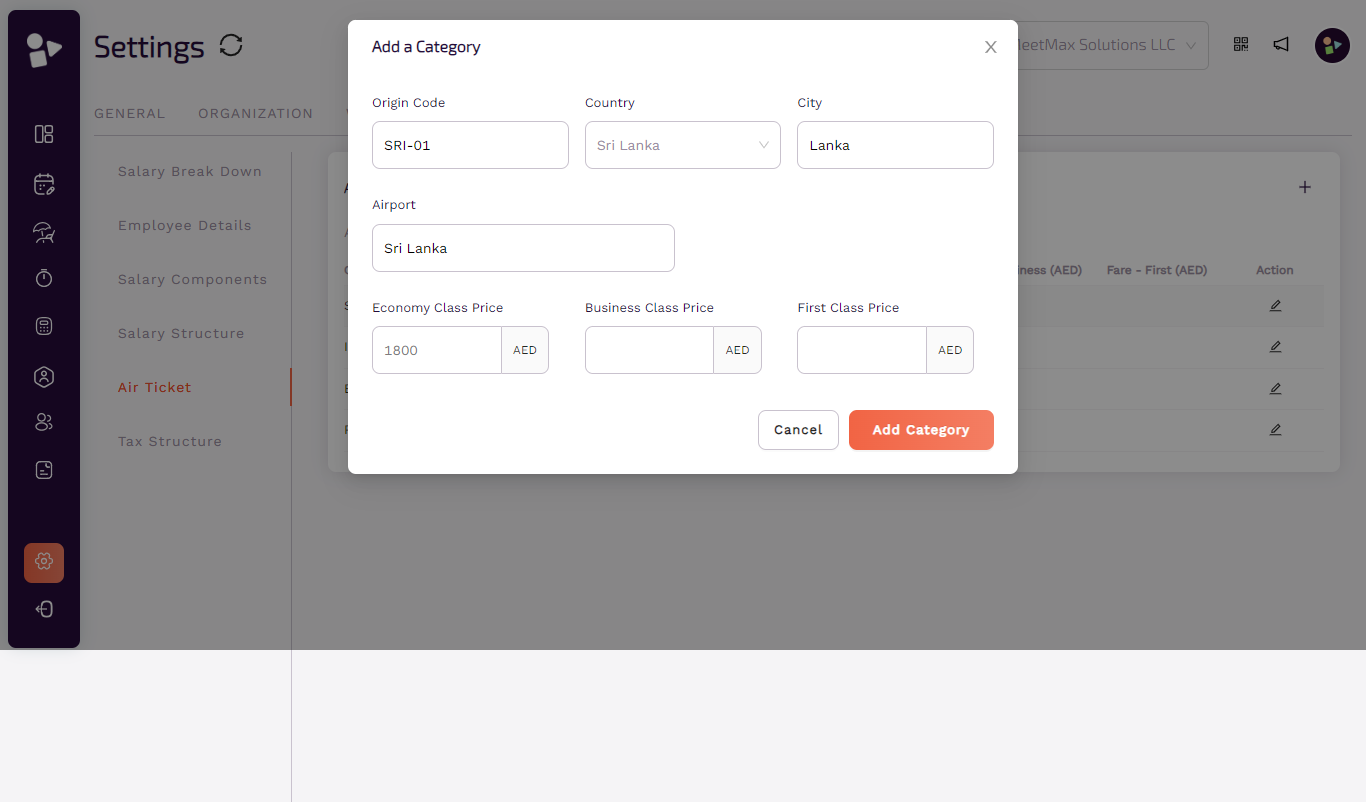
○ Add details to the category such as origin code, country, city, airport, price of economy, Business and first class.
○ Click on add category to save changes.
○ Click on edit to make changes.
○ Click on add new.
○ Add details to the category such as origin code, country, city, airport, price of economy, Business and first class.
○ Click on add category to save changes.
○ Click on edit to make changes.
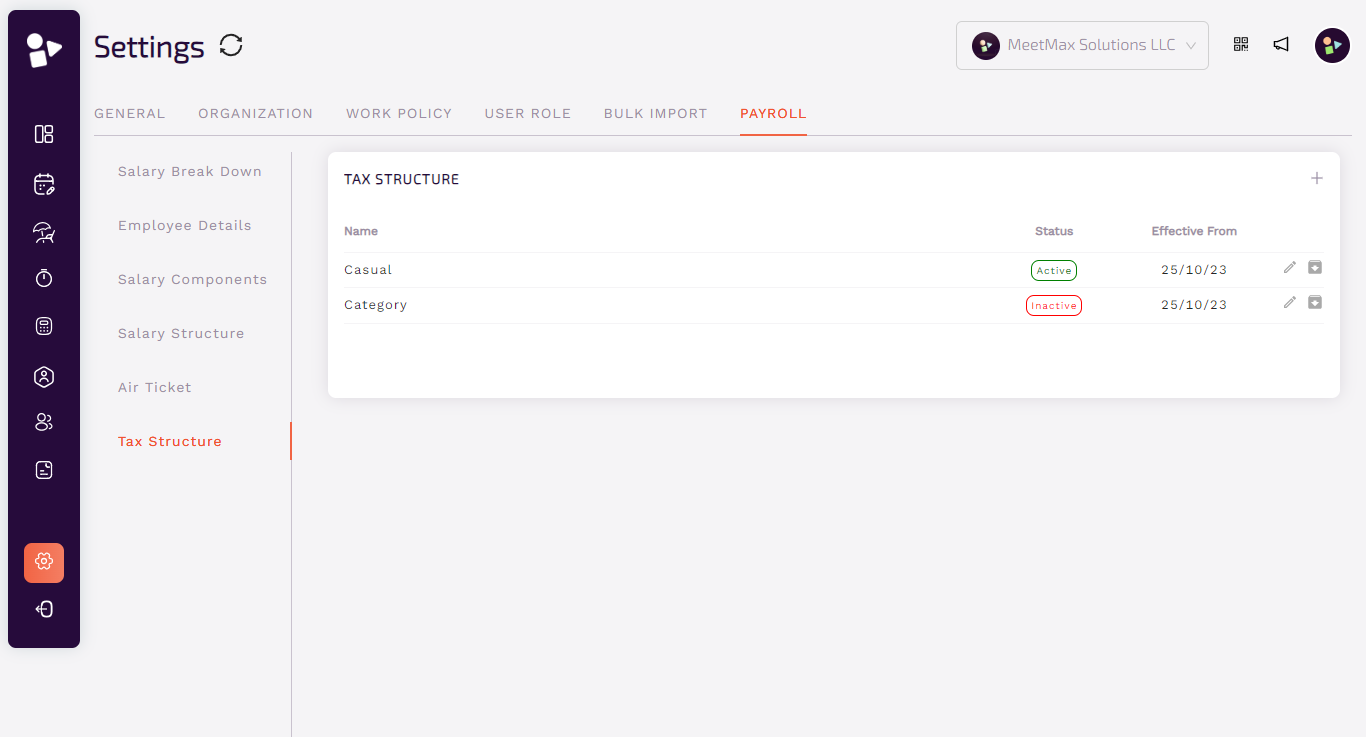
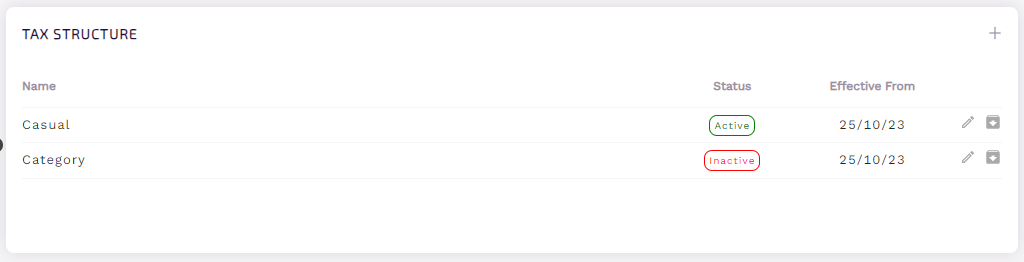
Tax Structure
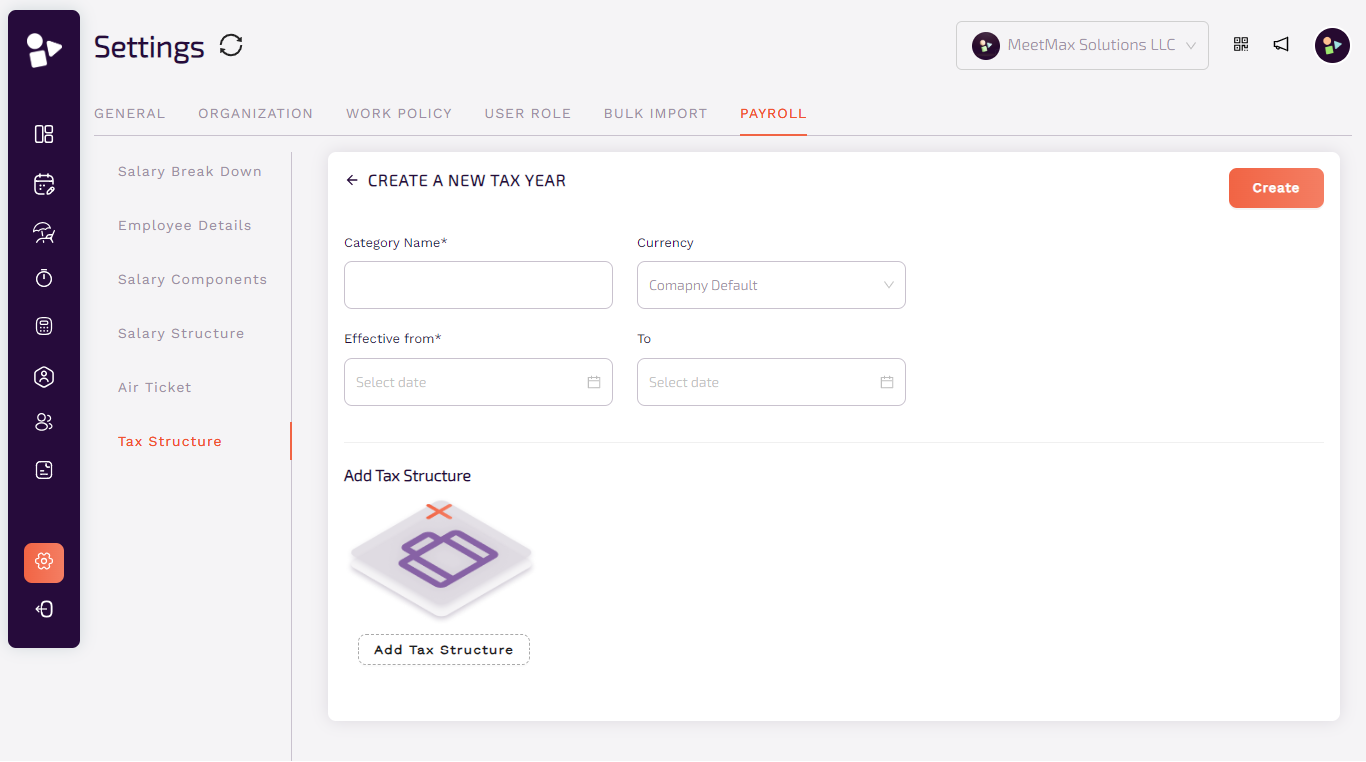
○ Admin can create a new tax year structure, to create click on create.
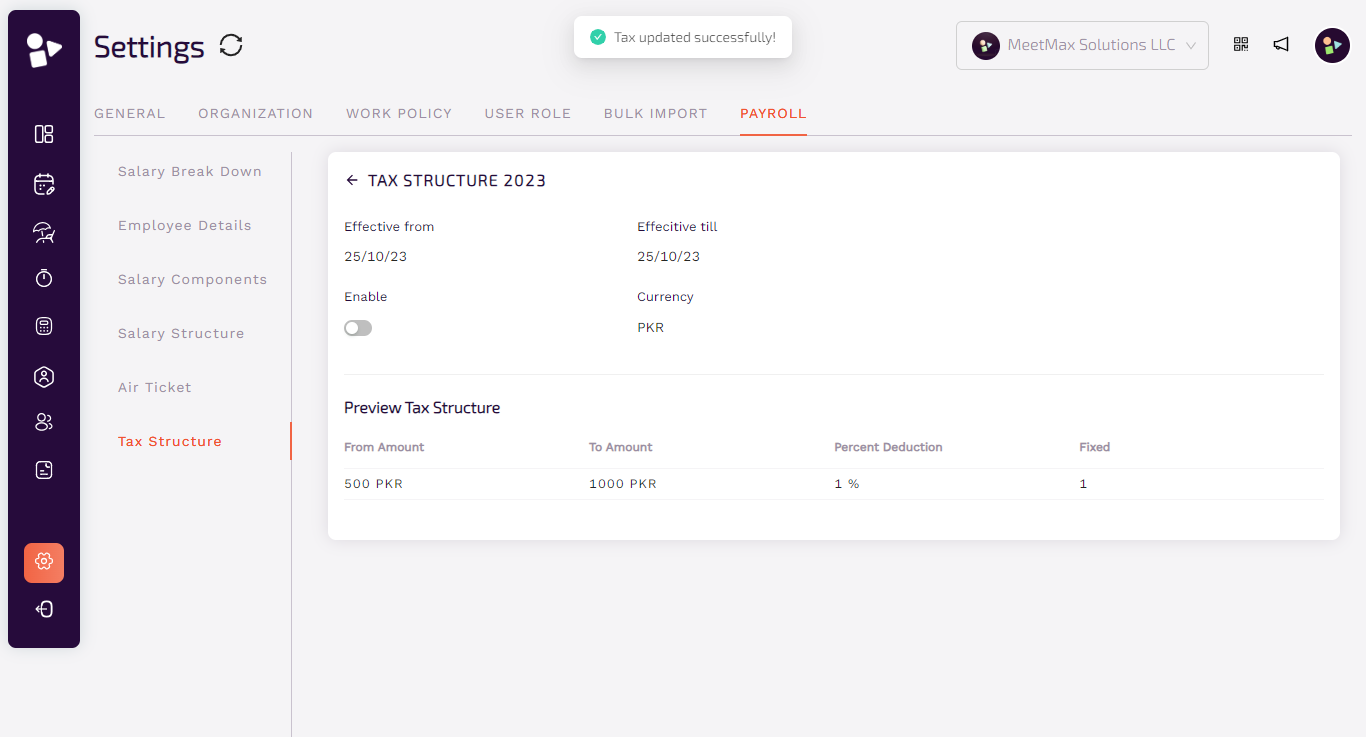
○ Add category name, currency, date effective from and to.
○ Add tax structure in the rows.
○ Add category name, currency, date effective from and to.
○ Add tax structure in the rows.